
How to Setup a Classroom Design Studio
Design Studios, aka makerspaces are a key part of hands-on learning. This space will increase student engagement and improve student motivation. They are easy to create, Earth friendly-hello recyclables, and will improve your students’ problem solving skills! Integrate this area into any subject for any grade level and your classroom will become transformed.
It’s time to increase lesson engagement and have your students excited to learn!
Six years ago, I introduced engineering into my classroom using a Design Studio. The first day my students entered my room they were drawn to it! The awe on their faces quickly turned into questions. What is this? What is it going to be used for? Can we use it now? To say the students were excited is putting it mildly. They wanted to dig in immediately! I explained to the students that today they would “free build” to get to know the Design Studio. They all cheered in anticipation! After the initial introduction, I incorporated the makerspace into math, science, reading, social studies, etc. Students return to visit me year after year explaining the impact this simple space had on their learning.
Read on to find out the steps to setting up a successful Design Studio.
You will learn the following:
⚙️ Material collection
⚙️ Suggested materials
⚙️ Helpful tips
⚙️ Examples of how I have used the Design Studio in my classroom
How to Start
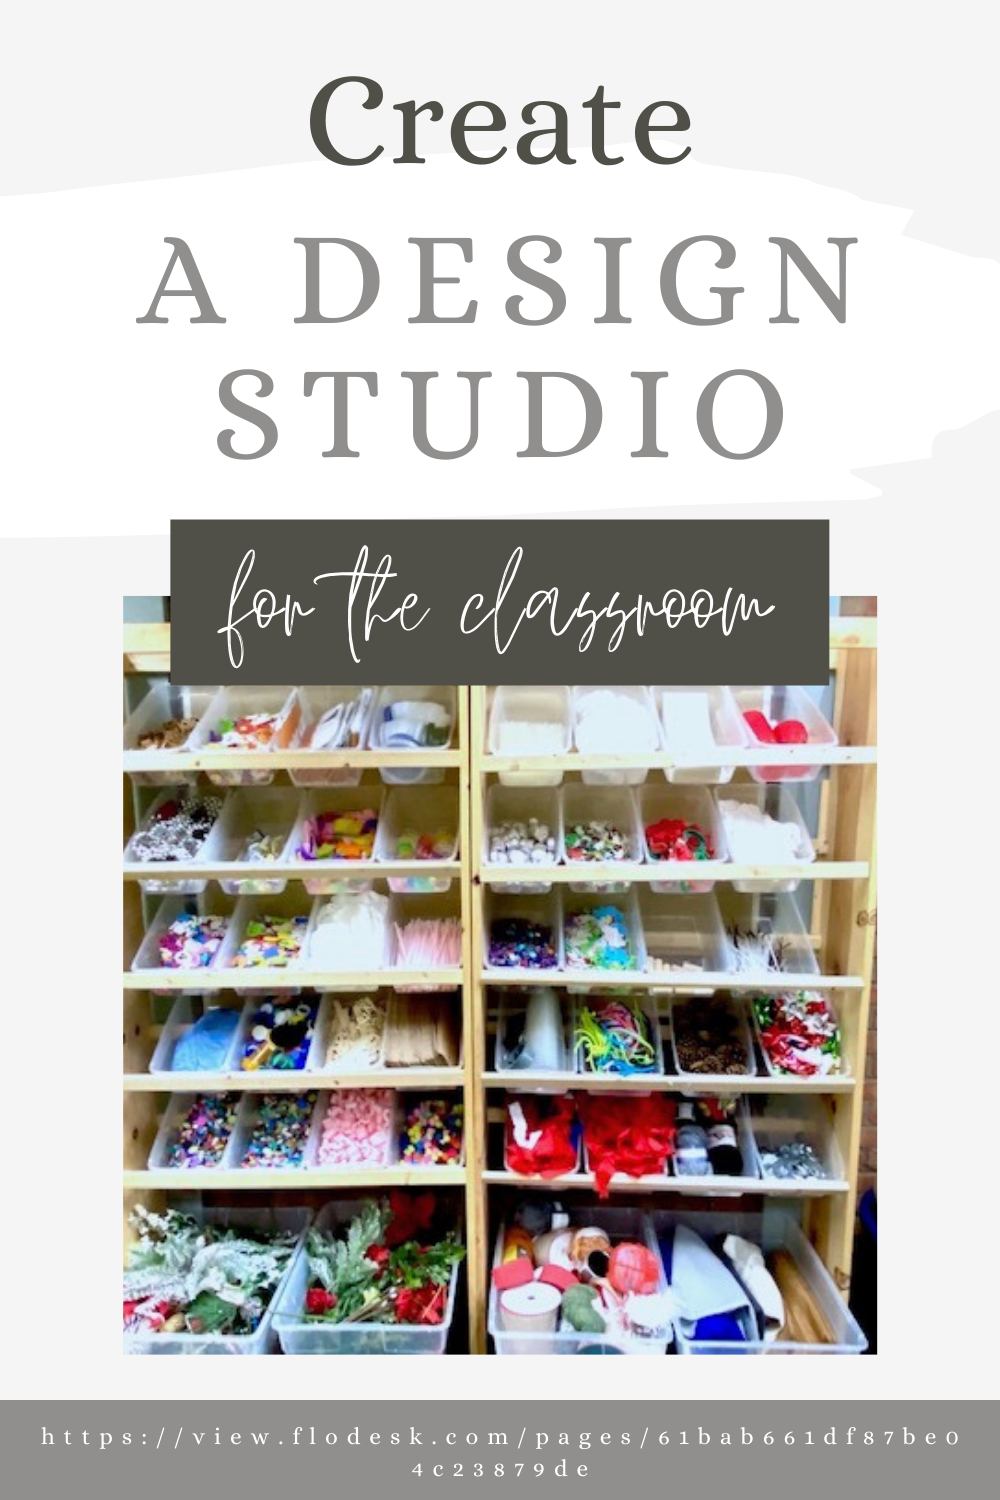
The first thing to do is create a location to collect recyclable materials. This can be as easy as having a bin filled with a mixture of supplies, shoe boxes with items organized into separate spaces, or a grocery bag with random supplies that can be shared between a group of students. I have built a permanent location in my classroom because I rely on engineering so much in my teaching.
The materials I collect are free and easy to gather. I find that families are looking for a way to support the school, however some are not comfortable or do not have time to volunteer. These donations allow families to support our learning while decluttering their house. In my book, it’s a win-win for everyone! The following is a list of items that I suggest for donations:
⚙️ Paper towel rolls
⚙️ Coffee filters
⚙️ Popsicle sticks
⚙️ Leftover toy parts
⚙️ Nuts & screws, etc.
⚙️ Packing peanuts
⚙️ Plastic caps from bottles
⚙️ Wine corks
⚙️ String
⚙️ Fabric
I do use masking tape and glue sticks as the key component to attach items together. White glue is helpful for younger elementary students, however beware because it can get messy!
Important Ideas to Remember
When students are using the Design Studio I have a few key expectations. The first is (if the students have to go to one location for supplies) they must only grab 5 items and then they must return to their seat. After all students have gathered their first 5 materials the students can come back and forth as much as they please. This quickens the initial “shopping” time.
I also explain that if students are building in partners they must decide who will keep their model. There have been many times that this conversation did not occur before model building. When the design was complete the students began to argue about who would keep the prototype. If they both want to keep the model, they can each build side by side and create the same model.
Ways I Have Incorporated Engineering Into My Classroom
I have incorporated engineering and building in many ways. In ELA, building fits in easily with read alouds or books the students are reading. Students can build the setting, create a 3D representation of the solution (or a new solution), or create an item a character could use.
In math, I have created a few challenges that cover some of the main concepts I teach in my classroom. My students have a blast using their math knowledge to solve the provided problems. I love the STEM Math Challenges because I print the student engineering journal, introduce the challenge, and the students take it from there!
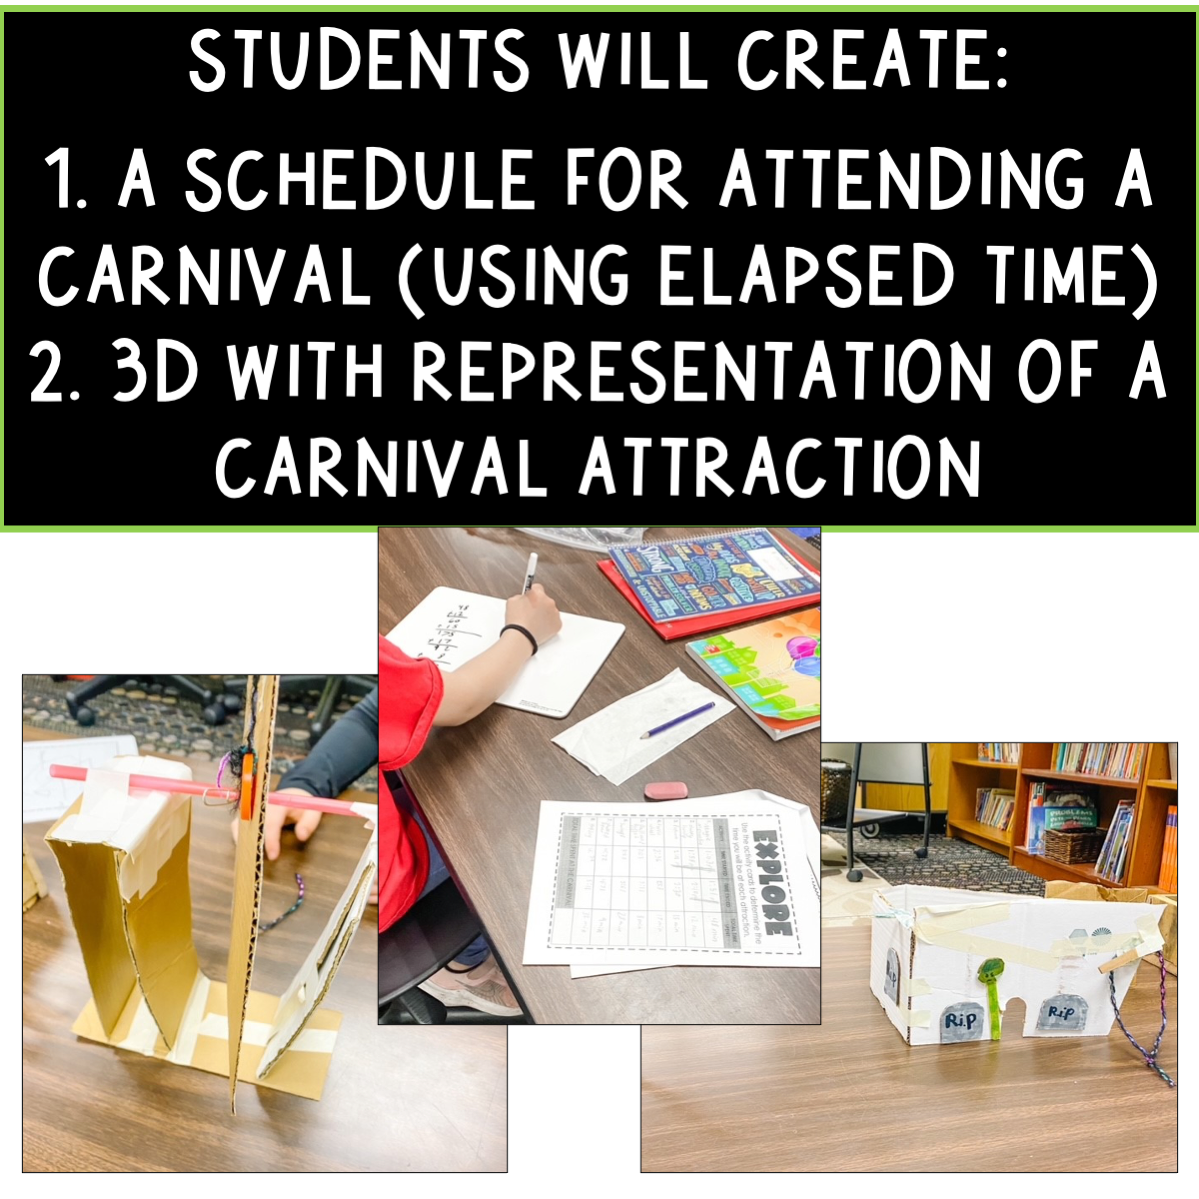
Science and social studies pair with engineering easily. For example, science students can make working simple machines or a model of the Sun, Earth, and Moon. In social studies, students can create landscapes of regions or battles, buildings, or items that represent places or an event.
Ready to Get Started?
Still not sure? Just give it a go. Start with collecting minimal supplies. Organize your material in a simple way (see above) and select the subject you will dive deeper into by engineering a model. Introduce the challenge to your students, have them brainstorm a solution, plan the solution, and build a model of their solution. Watch the engagement and creativity soar!
Grab a set of free engineering posters here!
