

Unlock Your Child’s Potential: Must-Have Learning Resources!

I have some exciting news to share! I've been working hard on two new workbooks that are absolute must-haves for any elementary child in your house. One focuses on developing a growth mindset, and the other is all about fun STEM challenges. These resources are designed to build confidence and foster a love of learning. Your child will have a blast while developing real-world problem-solving skills. Get ready for some amazing educational adventures!
STEM Workbook for Kids
This hands-on STEAM workbook will have your child begging to engineer! Packed with 10 exciting challenges using everyday materials, it’s perfect for sparking curiosity and building problem-solving skills. Each activity follows the engineering design process, making STEM learning accessible and engaging. Plus, all materials are easy to find around the house.

Included in the STEAM Workbook:
10 STEM Challenges
Engineering Design Process Pages for each challenge
Engineering Design Process Cycle page
How to use the workbook
Each challenge uses everyday materials
Growth Mindset Workbook for Kids
Help your child develop a positive mindset with this growth mindset workbook. Filled with inspiring quotes and reflection activities, it encourages resilience and confidence. Perfect for supporting emotional and mental growth, this resource is a must-have for any parent or teacher. Having a growth mindset is important for children because it helps them embrace challenges, learn from mistakes, and develop resilience, which are essential skills for lifelong learning and success.
Included in the Growth Mindset Workbook:
Introduction to growth mindset
Easy to use - introduction to each concept and then a reflective activity for students
Many different growth mindset concepts such as - change your words - change your mindset, the power of yet, be grateful, be kind, etc.
These Resources Matter!
Investing in these workbooks means giving your child a head start on their bright future! The STEM workbook fuels their love for science and engineering, while the growth mindset workbook boosts resilience and a can-do attitude. Together, these resources offer a perfect blend of fun and learning that nurtures both their brains and their hearts. Let’s make education exciting and empowering!
Adding these workbooks to your toolkit means opening up a world of exploration, creativity, and growth for your child. The activities are super fun and engaging, making learning a blast for kids. Plus, with easy-to-find materials and clear guidance, you’ll find implementing these activities a breeze.
Get ready for an amazing school year with these must-have resources that ignite your child's creativity, critical thinking, and positive mindset. These workbooks are designed to make learning enjoyable and engaging, helping your child explore, create, and grow with ease. With easy-to-find materials and fun activities, you’ll find it simple to support your child's educational journey at home. Happy learning!

The Impact of Maria Montessori

Who was Maria Montessori?
Maria Montessori was many things throughout her life. She was a pioneer, an educator, a physician, and most importantly a creative. She is known for her educational method that explores how children learn naturally. She opened the first Montessori school—or Children’s House in Rome on January 6, 1907. The opening of this center changed early childhood education forever.
Maria Montessori was born August 31, 1870 in Italy. Maria grew up in Rome where she enjoyed libraries, museums, and fine schools. She was an excellent student: confident, ambitious and unwilling to be limited by traditional expectations for women. When Maria was 13 she entered an all-boys school to learn about engineering. She went on to graduate from medical school. She was one of Italy’s first female physicians.
In 1907 Maria opened a childcare center for children aged 3-7 in the poor inner-city district of Rome. The children did not have structure at first but Maria observed that they loved working with puzzles, preparing meals, and using the materials Maria had designed. She noticed that the children loved learning and soaked up ideas from their environments. This experience fueled Maria’s passion to improve education. Maria’s designed learning materials and created classroom environments that encourage children’s natural desire to learn. She also gave children the freedom to choose their materials. Her programs thrived which led to Montessori schools thriving.
What is the Maria Montessori educational theory?
Maria Montessori’s educational theory relies on 6 principles: Independence, Observation, Following the Child, Correcting the Child, Prepared Environment and Absorbent Mind.
Independence: The belief is that if a child can do it, they should. Give the child opportunities to complete tasks on their own.
Observation: Watching the child is a way that adults can learn about the child’s needs.
Follow the Child: Do not tell the child what they need to do rather provide them with different choices of materials. There is no need to intervene unless the child becomes destructive and is about to hurt himself or others.
Correcting the Child: When a child makes a mistake, calmly notice the mistake and ask the child to do some practical work with you. For example, if a child spills their milk calmly say “You spilled your milk why don’t we get a cloth and clean it up.”
Prepared Environment: The environment needs to be ready and beautiful, inviting children to do work (some may look at this as play). Rooms should be safe, allow movement, and choice and have child sized materials set up for success.
Absorbent Mind: Children absorb everything in the environment by experiencing it, being part of it.
I feel that this philosophy goes hand in hand with growth mindset and STEM education. Two of the pillars of my practice. Growth mindset is all about children feeling safe so they will take risks and not be afraid to make mistakes. It is important that the teacher becomes the observer and determines what the students’ need based on their actions. The environment is important so students are able to move around and explore. When introduced to a problem in STEM they need to be provided with choices so they can dictate their own learning and provide a strong solution..
How is Maria Montessori impacting early childhood education?
Maria Montessori’s way of teaching is impacting early childhood education in traditional classrooms in 3 major ways. Education is now focusing on whole child development, individualized learning, and integrated instruction. Whole child development is exactly that, addressing the needs of the whole child. We no longer just address academic needs, we also focus on the social-emotional needs of the child. When a child’s emotional needs are being met it is much easier to address their academic needs. Traditional classrooms are now realizing that there is no “one size fits all” curriculum. Instead it is important to take into account learning styles and to embrace student-led learning. Finally, integrated instruction combines subjects and approaches them in a more real-world manner. This increases student confidence and will help to create independent thinkers.
I plan to embrace Maria’s idea of student choice. In my STEM room I feel it is important that students are able to build with materials they are drawn to and come up with unique solutions they are proud of. I will introduce the challenge or activities to my students and then allow them to explore with various resources that will be best suited for them. For example, if my younger elementary students are exploring the idea of height. It is important that they are able to build using resources such as sticks and then compare them to building with blocks, and finally cardboard. These varied observations will give them a solid understanding of materials that are easy to build with and those that might be more of a struggle. My STEM classroom is in a traditional elementary school however I incorporate many of Maria’s ideas into my own practice.

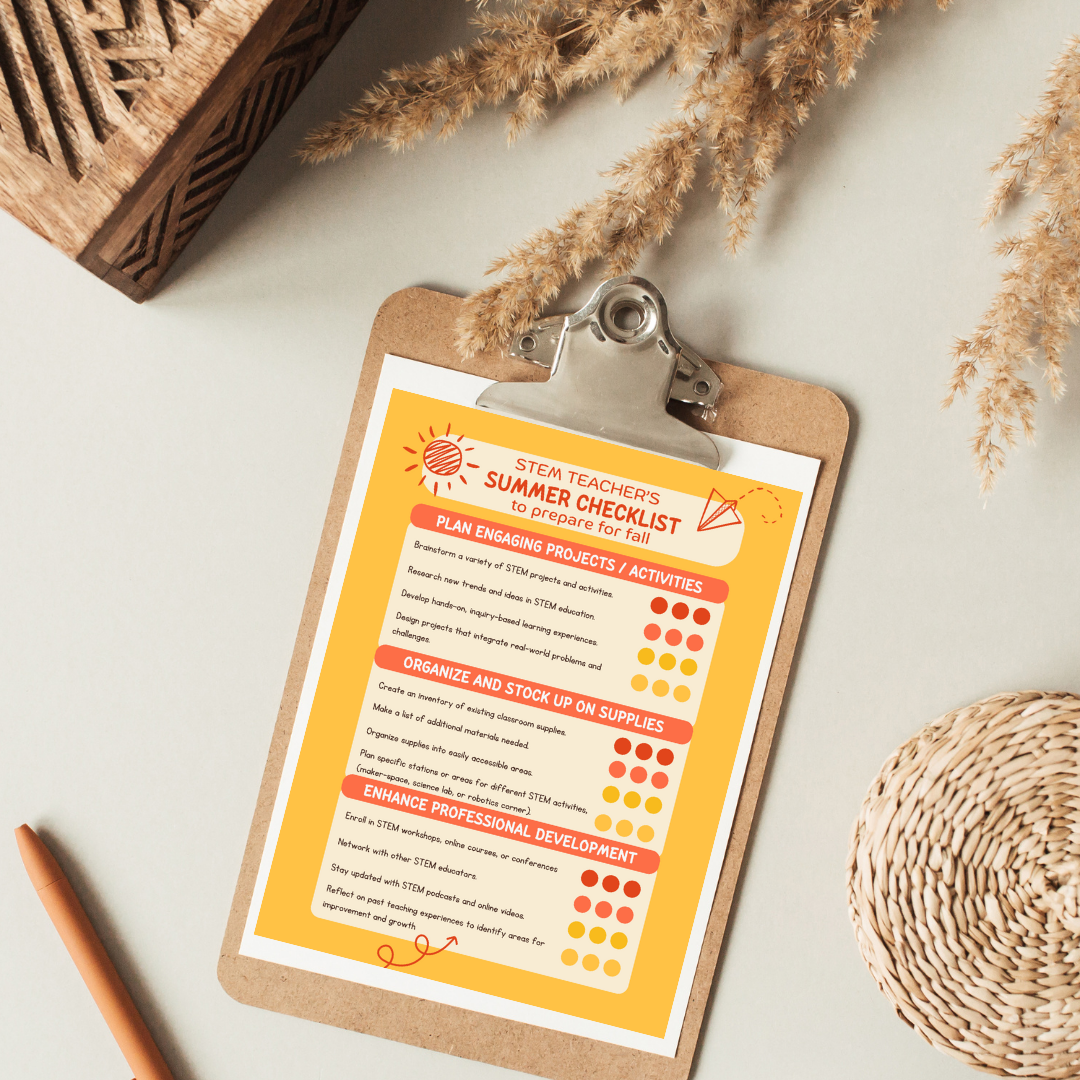
Top 3 STEM Teacher Tips To Get Ready For Fall
Here are the top 3 STEM teacher tips to get ready for fall: Start by organizing your classroom with labeled bins and designated stations to streamline materials. Plan engaging, hands-on projects and activities that incorporate real-world challenges and promote critical thinking. Finally, take time to review and reflect on past lessons, identifying what worked well and areas for improvement. Read the full blog post for more details: Top 3 STEM Teacher Tips to Get Ready for Fall.
Having extra time during the summer is a gift. I like to use some of this time to prepare for the new school year. It's essential for STEM teachers to take advantage of these months to prepare for a successful and engaging fall semester. Here are three key tips to help you get ready for the upcoming school year. When the beginning of the year rolls around, the more you have prepped the smoother your year will roll out. If you would like a checklist of these tips to help you prepare click here.
1. Plan Engaging Projects and Activities
One of the most important things you can do this summer is to brainstorm and plan out a variety of exciting STEM projects and activities. Think about the hands-on experiences that can captivate your students' imaginations and foster a love for STEM.
- Brainstorm and Research: Reflect on what worked well in the past and what could be improved. Research new trends and ideas in STEM education, such as coding, robotics, environmental science, and space exploration. Look for fresh ideas that can invigorate your curriculum.
- Develop Hands-On Learning: Focus on projects that emphasize hands-on, inquiry-based learning. Create opportunities for students to work with tangible materials and engage in experiments that require critical thinking and problem-solving. Consider activities like engineering challenges, science experiments, and technology projects. My favorite material in the classroom is cardboard, it’s free and the students can manipulate it in infinite ways!
- Integrate Real-World Problems: Make learning more meaningful by incorporating real-world problems and challenges into your STEM projects. Identify issues that resonate with your students' lives and communities, such as environmental sustainability, renewable energy, or health and wellness. Design projects that require students to apply their STEM knowledge to develop practical solutions.

2. Organize and Stock Up on Supplies
Having a well-organized and well-stocked classroom is crucial for a smooth and effective teaching experience. Use the summer to ensure you have everything you need to kick off the school year right. Being prepared when your kiddos walk through your door will set everyone off on the right foot.
- Inventory and List: Create an inventory of your existing classroom supplies. Take note of what you have and what you might need. Think of the materials you used a lot last year, my list includes: cereal boxes, pipe cleaners, corks, paper towel tubes, etc. Get a cardboard box and start collecting these at home, or ask friends and family to put them aside for you. Then make a list of additional materials required for the planned projects and activities.
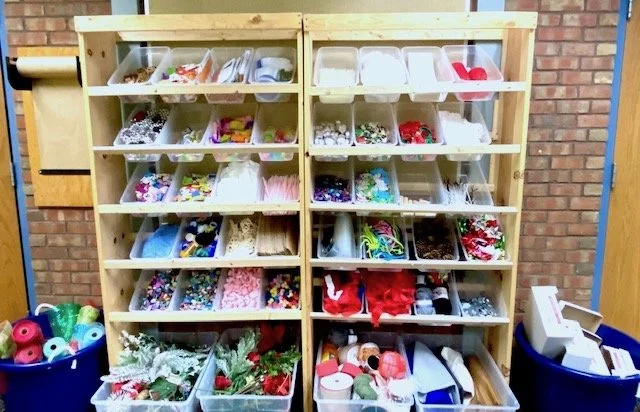
- Organize Supplies: Organize your supplies into easily accessible areas. Consider creating specific stations or zones for different types of activities, such as a maker space, science lab, or robotics corner. This organization will save time and make it easier for students to find what they need.
- Stock Up: Ensure you are well-stocked with essential items like building materials, lab equipment, and tech tools. Start collecting the recyclable building materials. These are free and the students love building with them. These items include cardboard tubes, corks, boxes, tops of fruit pouches/soda plastic bottles, etc. Also, items from nature are great to build with. Look for pinecones, acorns, sticks, etc. these items are well loved by the students in my room. Also, look for back-to-school sales and bulk purchasing options to save on costs. Having everything ready and at hand will help you start the year off smoothly.
3. Enhance Professional Development
Summer is an excellent time to focus on your professional growth and development. Take advantage of workshops, online courses, and conferences to enhance your STEM teaching skills and stay updated on the latest trends.
- Enroll in Workshops and Courses: Look for summer workshops, online courses, conferences of my favorite…podcasts that focus on STEM education. These can provide valuable insights, new strategies, and innovative ideas that you can bring into your classroom. Learning from people who do what you do is the best way to gain ideas to implement in your classroom.
- Network with Other Educators: Connect with other STEM educators to exchange ideas and resources. Join online forums, join groups on Facebook or follow people on Instagram, attend networking events, and participate in professional learning communities. Collaborating with peers can inspire you and help you find new approaches to teaching. Be brave, share what you are doing in your classroom and others will respond!
- Reflect and Plan: Use this time to reflect on your past teaching experiences. Identify areas for improvement and set goals for the upcoming school year. Start by creating a list of the lessons you want to repeat. Consider how you can incorporate new technologies, strategies, and ideas into your teaching to make your STEM lessons even more impactful.

By following this checklist, you can ensure that you are well-prepared to provide an engaging and effective STEM learning environment for your students this fall. Taking the time to plan, organize, and enhance your skills over the summer will set the stage for a successful and rewarding school year. I hope this year is your best yet! Inspire your students and enjoy the daily grind!
Stay Curious,
Gillian

Math Center Activities
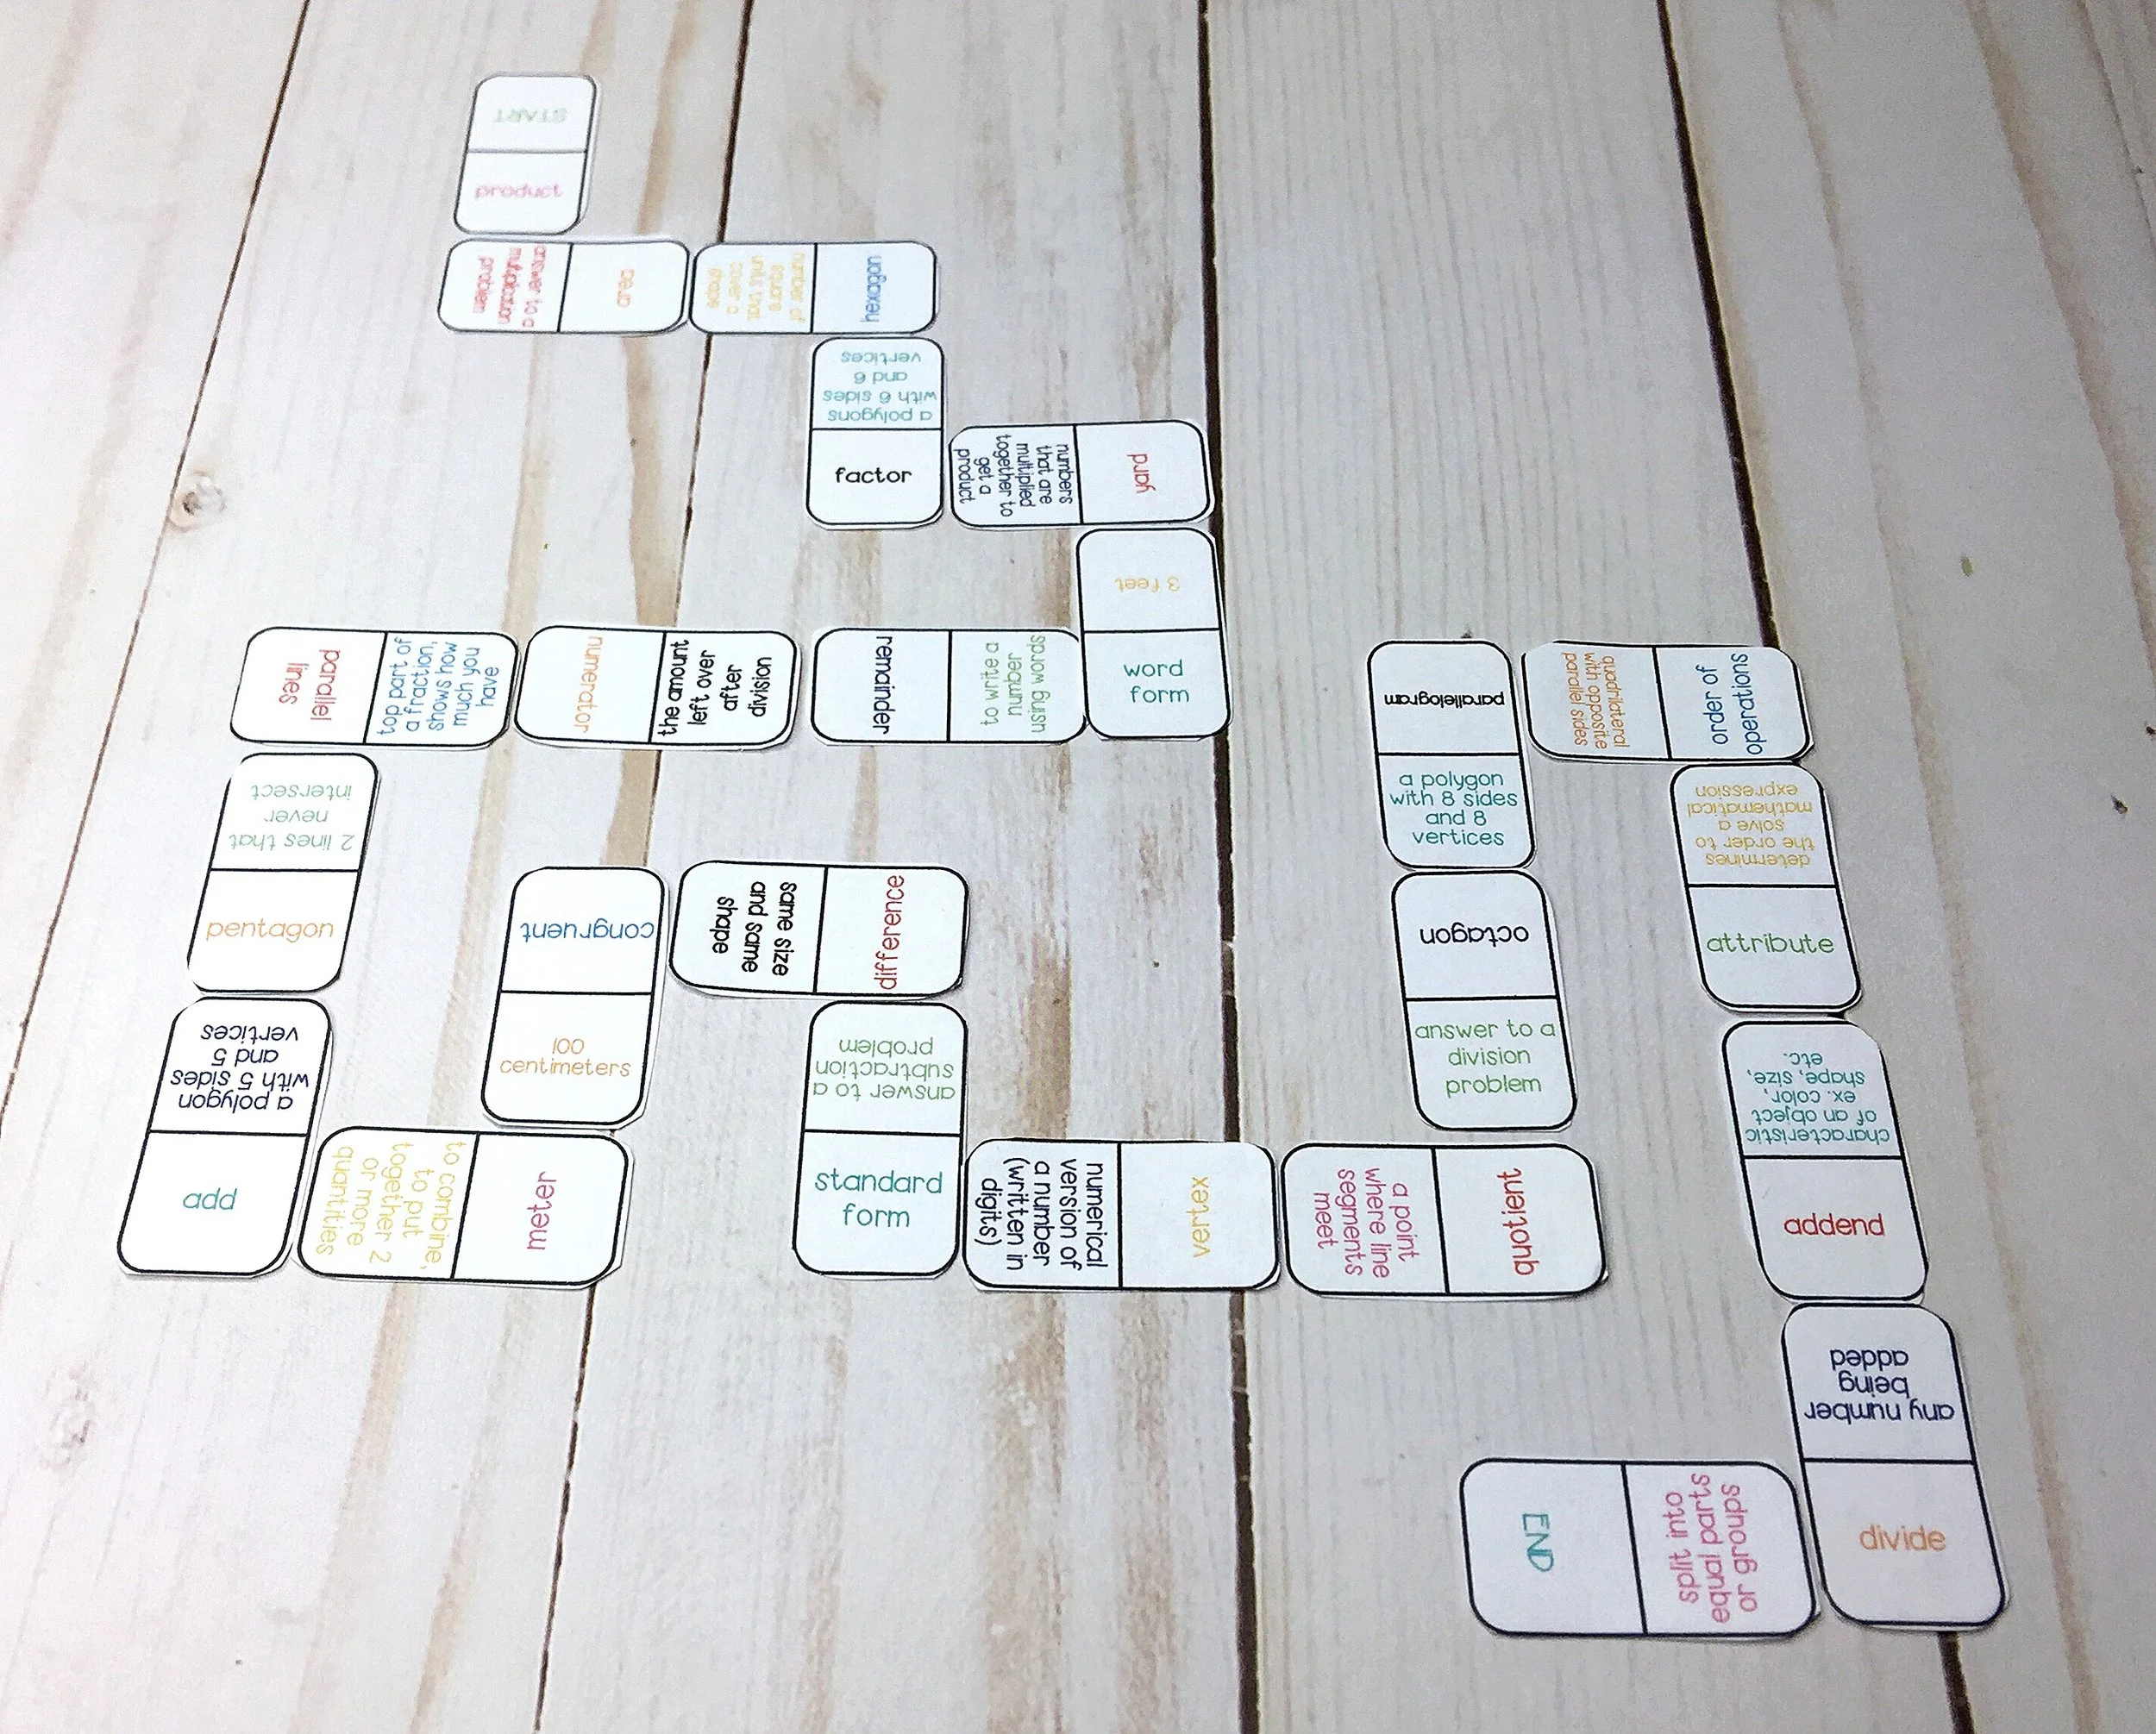
Do you use math centers in your classroom? If not, you should! They are a fun way to provide elementary students with hands-on learning experiences that reinforce math concepts. Centers transform the traditional classroom into an interactive learning environment where your students will practice math skills through games, activities, and collaborative problem-solving. One particularly effective tool for math centers is the use of math domino games, they are easy to use and as an added bonus ... .they check themselves!
4 Important Reasons to Use Math Centers
Differentiated Learning: Math centers allow you to cater to the varying skill levels of your students. By providing activities at different levels of difficulty, all students can take part and find tasks that are appropriately challenging.
Student Engagement: Hands-on activities and games make learning math more fun! Students are more likely to stay focused and retain information when they are actively involved.
Collaborative Learning: Math centers encourage teamwork and communication among students. Working together to solve problems helps students develop social skills and learn from one another. With so much screen time these days, collaboration is a skill that all students need to be practicing.
Independent Practice: Centers provide opportunities for students to practice skills independently, reinforcing what they have learned in a low-pressure setting.

Setting Up Math Centers Is a Breeze!
Setting up math centers can be simple and effective with a bit of planning. Here are some steps to get you started:
Identify Key Concepts: Determine which math concepts you want to reinforce. This could include basic arithmetic, fractions, geometry, or problem-solving skills.
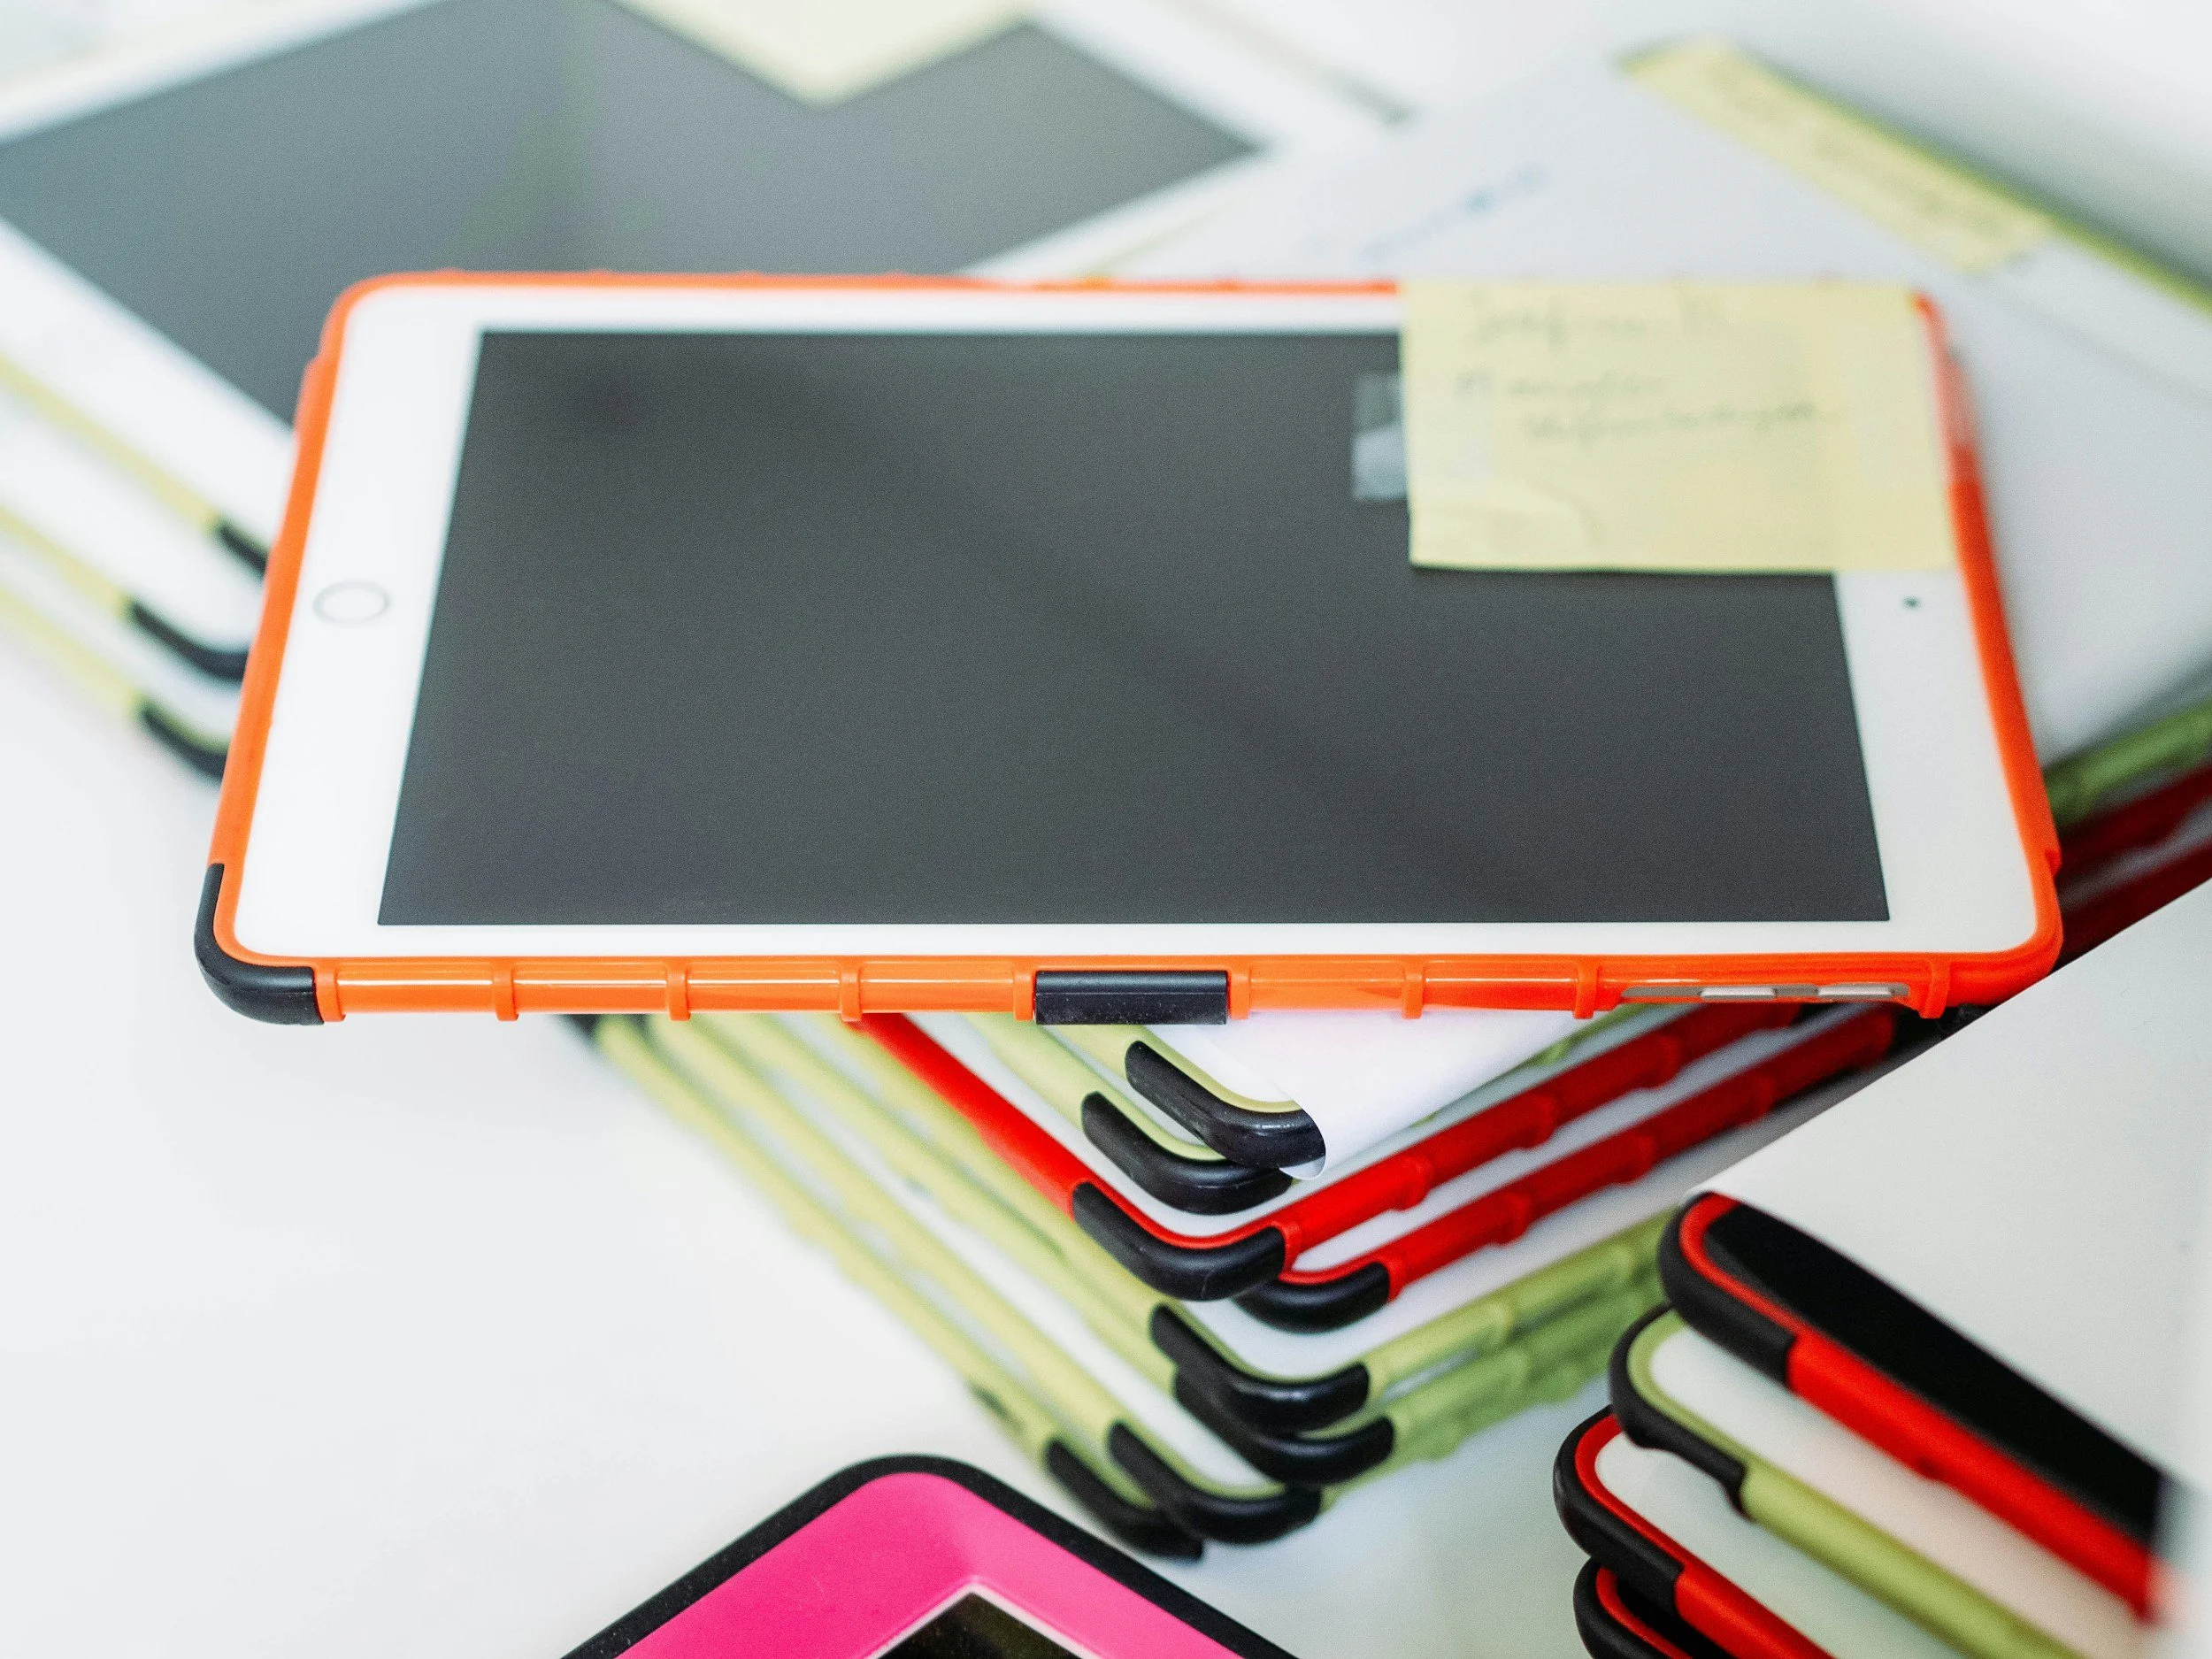
Organize Materials: Gather all the necessary materials for each center. This might include any or all of the following: manipulatives, worksheets, math games, and technology resources like tablets or computers.
Create Clear Instructions: Ensure that each center has clear, concise instructions so students can work independently. Visual aids and examples can be very helpful. Also, make sure that you have modeled the center before the students practice on their own.
Rotate Regularly: To keep things fresh and exciting, rotate the activities in your math centers regularly. This will help maintain student interest and cover a broad range of math skills.
🔦 Spotlight: Math Domino Games
Want to make planning math centers a breeze? Math domino games are your answer! These games are not only fun but also highly educational, reinforcing key math concepts through interactive play.
Benefits of Math Domino Games:
Enhance Arithmetic Skills: Math domino games can help students practice addition, subtraction, multiplication, counting coins, geometry, etc. in a fun, engaging format.
Improve Pattern Recognition: Matching numbers and vocabulary terms helps students develop critical thinking and recognition skills.
Self Checking: Students know that when they arrive at the end of the game if they have additional dominoes they have made a mistake somewhere. This allows the students to assess their own work and puts less work on the teacher.
Foster Social Interaction: Domino games are typically played in pairs or small groups, promoting communication and teamwork among students.
It’s Time to Bring Math Domino Games to Your Classroom
Ready to enhance your math centers with engaging and educational activities? Math domino games are a perfect addition that will captivate your students and reinforce essential math skills. Check out our selection of math domino games designed specifically for elementary students. Each set comes with clear instructions and is tailored to different math concepts, ensuring that you have the right tools to make math learning fun and effective.
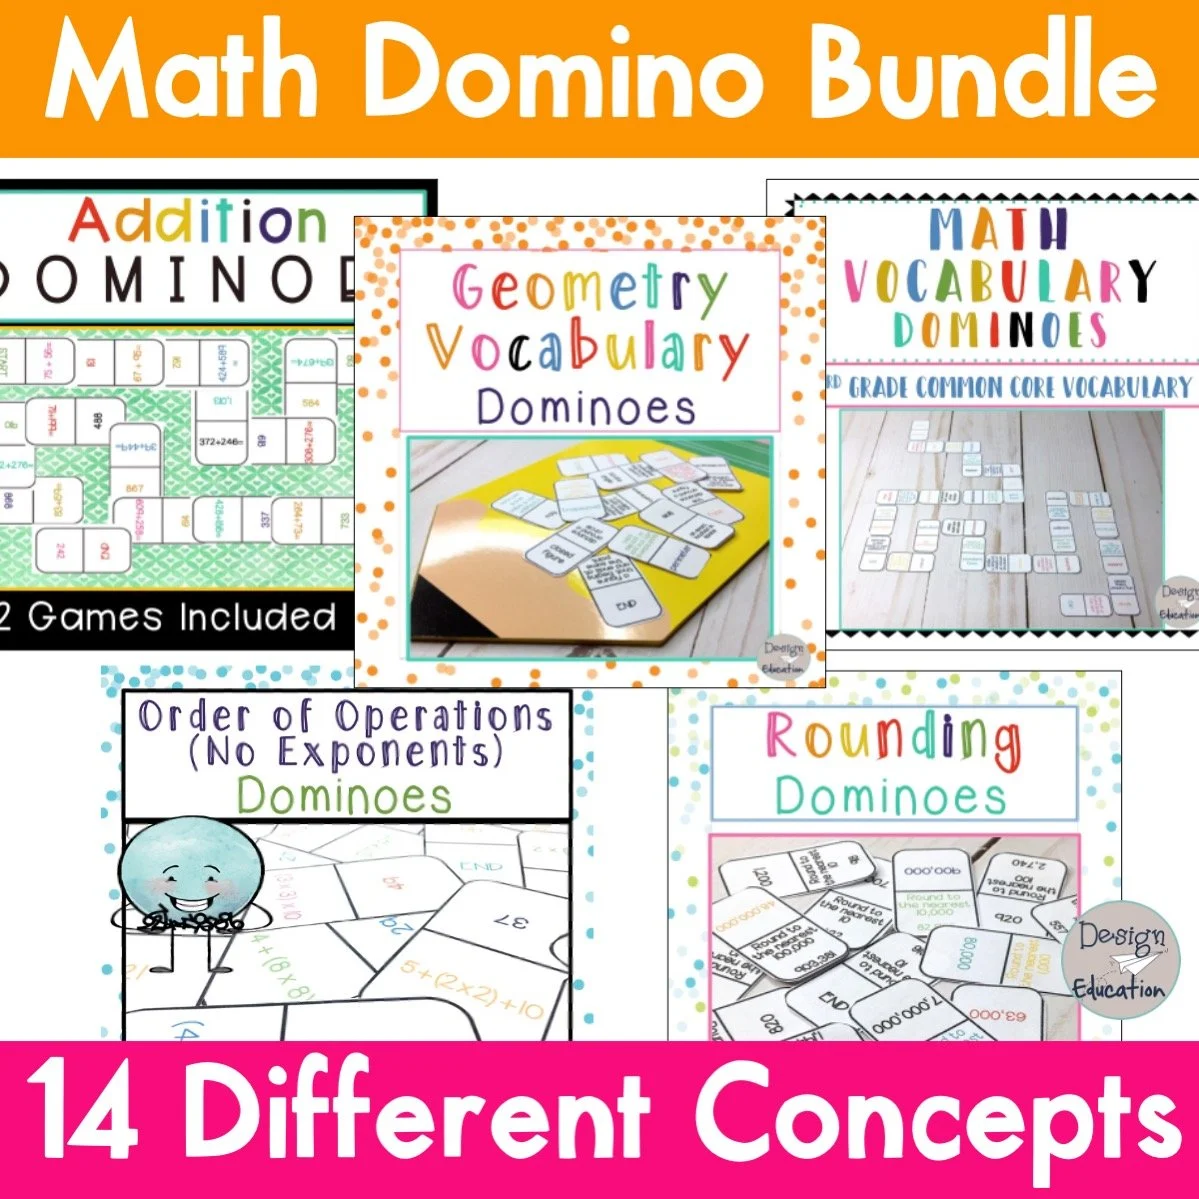
Each game can be purchased separately or save yourself money and grab the Ultimate Bundle which includes the following 14 concepts!
Addition
Subtraction
Multiplication
Division
Telling Time
Order of Operations
Finding Place Value in Whole Numbers
Area & Perimeter
Geometry
Math Vocabulary
Mixed and Improper Fractions
Multiples & Factors
Counting Coins
Rounding
I hope you have an amazing school year!
Stay Curious!

Investing in quality math center activities like math domino games can make a significant difference in your students' understanding and enjoyment of math. Start today and watch your students' math skills soar!

This or That STEM Task Cards
Are you looking to provide focused choice, motivate students, and incorporate STEM? I’ve got your answer!
I absolutely love teaching coding. However, students move through the activities at various speeds. Some students finish in 15 minutes while other students take most of the 55 minute class. To provide time for the slower workers to complete the assignment I needed an activity for the fast finishers to turn to. This is where “free build” with non-consumables (Magnatiles, Legos, Smart Coins, Zoobs, Trios, etc) came in. However, after a couple of classes I noticed some issues arising! Students were building the same items over and over, they were getting louder, and the thinking/problem-solving was decreasing.
What was I to do????
I am always up for a challenge so… I created This or That STEM task cards!

This or That Winter STEM Task Card
WHAT ARE THIS OR THAT STEM TASK CARDS?
This or That STEM task cards are a simple concept. And who doesn’t like simple things? They are themed cards (winter, Valentine’s Day, St. Patrick’s Day, etc.) and each card has 2 themed items. Students select one of the items to recreate and build. Each seasonal set contains 20 different cards.
WHY ARE THE TASK CARDS IMPORTANT?
My free build problem was solved because the task cards provided the students with a focused choice. Students became motivated to build and were using their critical thinking skills. They had to observe the details of structures and problem-solve how the pieces of the items fit together. Most of the time I leave a variety of items to build from for example homemade playdough, Legos, Magnatiles, Keva planks, etc. The choice of material adds to the challenge because the students have to determine the best material for their builds.
WHEN CAN YOU USE THE STEM TASK CARDS?
I use these cards mostly for early finishers. However, later this month we have STEM night at our school. I plan on leaving out the This or That STEM task cards with non-consumable building materials. This way families can tour the space, meet me, and get a taste of building. I will not have to lead anything or have messy clean-up if any younger siblings get carried away!
One of the kindergarten teachers in our school uses the task cards as a morning warm-up and later in the day during center time. She likes the cards because even though her students can’t read yet they use the pictures to determine what to build. This or That STEM task cards can also be used for the following: STEM Lesson, reward activity, homework, indoor recess, fun Fridays, special party, engineering practice to incorporate the NGSS standards into your science lesson, to enhance a read aloud, etc.

Student with a winter STEM task card
WHERE CAN THE TASK CARDS BE USED?
This or That STEM task cards are very versatile, they can be used in a variety of environments. I use them in my STEAM classroom. Teachers in my building use them in their general education classrooms. However, they can be used while homeschooling or if you have a buddy classroom this would be a great activity to encourage collaboration.
HOW DO YOU USE THE TASK CARDS?
You are probably wondering how I use the cards. The process is easy, I just:
1. Print
2. Laminate - if I am feeling fancy
3. Cut
4. Pass out or for early finishers I have them in a pile for the students to sort through
5. Students build their item of choice
6. Share
Sharing is important because it provides students the chance to improve their communication skills. Here are the ways I have shared This or That STEM task cards in the past:
•Small group – students share in groups of 3 or 4
•Partner share – students take turns sharing with one other person
•Whole group – students share their build with the entire group
•Gallery walk – students leave their design and card at their spot and silently travel around the room looking at other’s designs. I often take a few minutes at the end to have students share something they notice.
•Take quick pictures (or have this as a student job) – upload to a google slideshow or to a sharing site like seesaw
There have been times that I display one This or That STEM task card. This means all students in the class only have the choice of building one of the two objects. The creativity that emerges is unbelievable! The students are always amazed at how they each build the same items so differently. While we are comparing and contrasting models, I have the students state a specific positive about another child’s build.
All in all, This or That STEM task cards have become a staple in my classroom. Once the students have used the cards they become pros (no more needing directions to complete). I also use the same deck over and over because there are 20 different cards to choose from. I am in the process of creating a set for all holidays and seasons of the year. They are such an easy way to get the students engaged and motivated to engineer!

STEM TIP # 2 - Teach Students to Have a Growth Mindset
Learn how to foster a growth mindset in the STEM/STEAM classroom.
This post may contain affiliate links. You pay the same and I get a small commission. Yay!
Do you have students who are constantly looking for the "correct" design in your STEM classroom? Many times these same students can't get started brainstorming ideas because they are afraid they will do the wrong thing. These students need to develop a growth mindset.
In this blog post we will discuss:
What growth mindset is
Why growth mindset is important to STEM/STEAM education
Ways to foster student's growth mindset

What is a growth mindset?
Having a growth mindset in the classroom is one of the most important aspects of education. A growth mindset is the idea that everyone has the ability to learn, grow, and improve their skills and intelligence. It is an approach to learning that is focused on effort, not results; progress, not perfection; and resilience, not failure.
Growth mindset goes hand-in-hand with STEM/STEAM education. Students are constantly being asked to work with others and consider viewpoints that may differ from their own. Students are also presented with a problem that they need to create a solution for. This typically means they need to research ideas that have already been created and improve upon them. Requiring students to think outside the box and take risks with their thinking.
Why is a growth mindset important?
When students have a growth mindset, they are more likely to take risks, to be open to new ideas, and are more motivated to succeed. In the classroom, students with a growth mindset are more likely to persist when faced with challenging tasks, to collaborate with peers, and to be more engaged in their own learning process.
Research has shown that there are many benefits to having a growth mindset in the classroom. Students who have a growth mindset are less likely to give up when faced with a difficult task and more likely to be successful in the long run. They are also more likely to accept feedback, to be more creative in problem-solving, and to be more resilient when faced with failure.
These characteristics correlate directly with the Engineering Design Process. Students with a growth mindset will be willing to collaborate with others and accept their ideas. They will try to improve upon designs because they understand any idea no matter how strong can always be improved upon. They will also be willing to tweak designs that may have failed the initial tests.

How do I foster a growth mindset in my classroom?
Creating an environment that encourages a growth mindset in the classroom is essential for a successful learning experience. Teachers can model a growth mindset for their students by showing them how to strive for their goals, recognize effort vs. results, and to be resilient in the face of challenges. I often share my own personal goals with my classes. For example, right now I am working to use my Peloton everyday, or for those of you who ride earn a daily blue dot. When I came down with the stomach bug this was a challenge. I explained to my students that at first I just thought I would have to start my streak again. However, with some collaboration with my husband we talked about how I could complete a 5 minute meditation and keep my streak going. The collaboration and outside the box thinking didn't derail my progress.
Teachers can also provide students with regular feedback and positive reinforcement to help them stay motivated and to stay focused on their goals. This feedback should be focused on the student's effort instead of the outcome. Recognizing students that work through a challenge rather than giving up is important. Also, when a student vocalizes a goal make sure to acknowledge their quest for achievement.
Picture books that focus on characters who have to take risks and work through challenges are also fantastic resources to read aloud to students. Biographies usually have this built in. A few that I have had success with are Salt in His Shoes (about Michael Jordan) and Papa’s Mechanical Fish (about the man who designed the submarine). There are also read alouds directly geared toward the topic such as The Magical Yet and The Most Magnificent Thing. I have used all of the titles in my room. They have each resulted in amazing discussions.
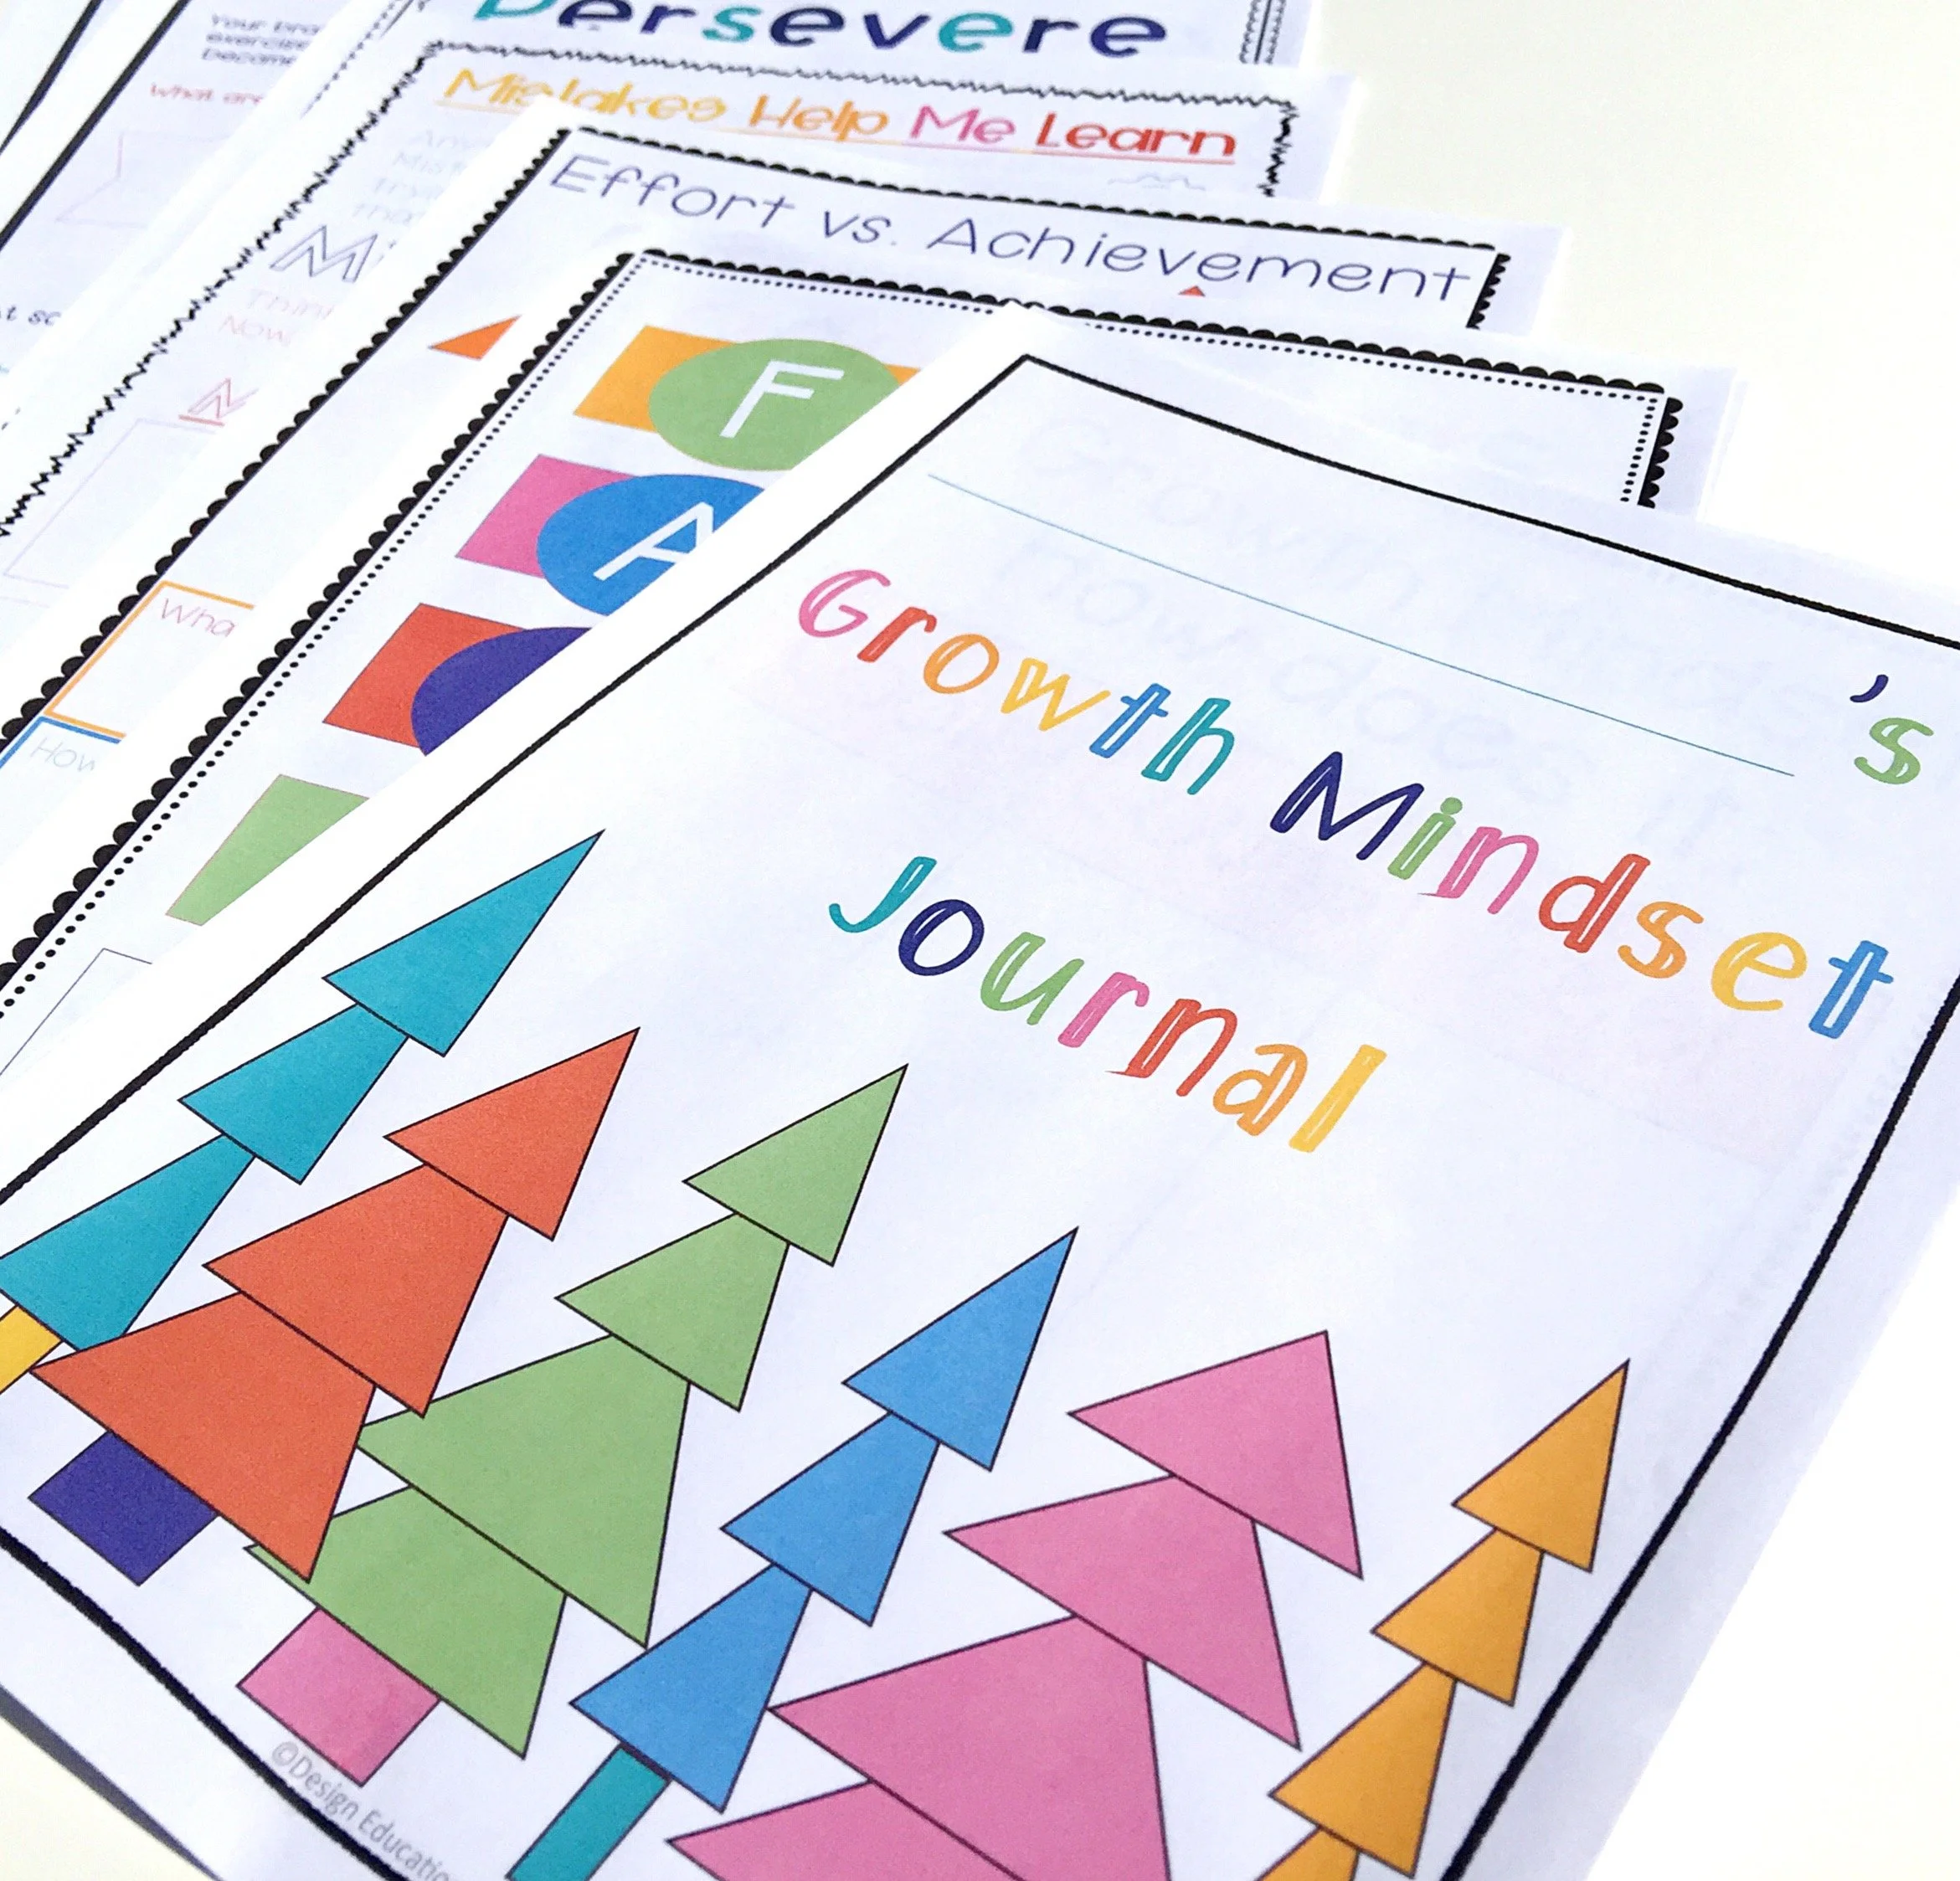
If you are looking for a more concrete tool to walk you through fostering growth mindsets you can use the Growth Mindset Journal that I have created. This journal highlights 16 different aspects of growth such as being brave, dreaming big, being grateful, etc. I like to highlight one idea with the entire class, discuss, watch a video (Class Dojo on YouTube has some great ones), and finally have the students reflect using a journal page.
There are many other ways to use the Growth Mindset Journal. Many teachers give the journal as an early finisher activity. Students determine the aspect they want to improve upon and reflect/plan at their own pace. This allows the students to jump around to various concepts and the teacher can provide specific feedback on their reflections.
Overall, having a growth mindset in the classroom is essential for students to be successful in their learning process. By creating an environment that encourages a growth mindset, teachers can help students achieve their educational goals and be successful in the long run.

STEM Tip #1 - Use Cardboard & Tape
This post may contain affiliate links. You pay the same and I get a small commission. Yay!
These everyday materials will make engineering in the classroom so much easier!
Why are cardboard and tape the best materials for a STEM challenge?
When I first started to incorporate STEM challenges into my classroom they always seemed so overwhelming. I would find an amazing activity on Pinterest and get so excited until I looked at the materials list… Running out to the store the night before with absolutely no budget was not an option. That’s until I discovered that almost every challenge can be completed using just cardboard and masking tape.
There are many reasons cardboard and tape are excellent resources for STEM challenges however I want to highlight my top four.
Cardboard and tape are easy to find and are inexpensive
Cardboard and tape are everyday materials that inspire students to create at home
There are a lot of different ways to cut, fold, and reshape cardboard
Cardboard and tape can be used in grade level classrooms or for STEAM specials
Reason #1 - Cardboard and tape are easy to find and are inexpensive
If your house is anything like mine, you have a constant flow of Amazon boxes. I constantly break these down and cut them into usable pieces for my students. I do have a secret about how to keep your hands from aching while cutting all the cardboard…a cardboard cutter! I prefer this one so much I have purchased it more than once! Now that I have traded my scissors for this rotary cutter I never looked back. Do yourself a favor, your hands will thank you!
At our school building we also get reams of paper delivered in white cardboard boxes. I do the same with these, I break them down and cut them into usable pieces. The custodian loves me because I take that job off of her hands.
As far as masking tape goes, be careful when you order. I have tried many different brands but I find this pack gives me the most bang for my buck. I have used tape in the past that immediately curls and falls off. There is nothing more frustrating! I haven't had that issue with this brand. However, I do teach the students to place the tape on their design and then rub it down so it turns translucent.
The other benefit of using cardboard and tape in your classroom is that families can easily donate to your supply. This is an inexpensive (or a free) way for families to feel like they are contributing to the classroom. Be careful, if you ask for cardboard box donations you will receive A LOT!
Reason #2 - Cardboard and tape are everyday materials that inspire students to create at home
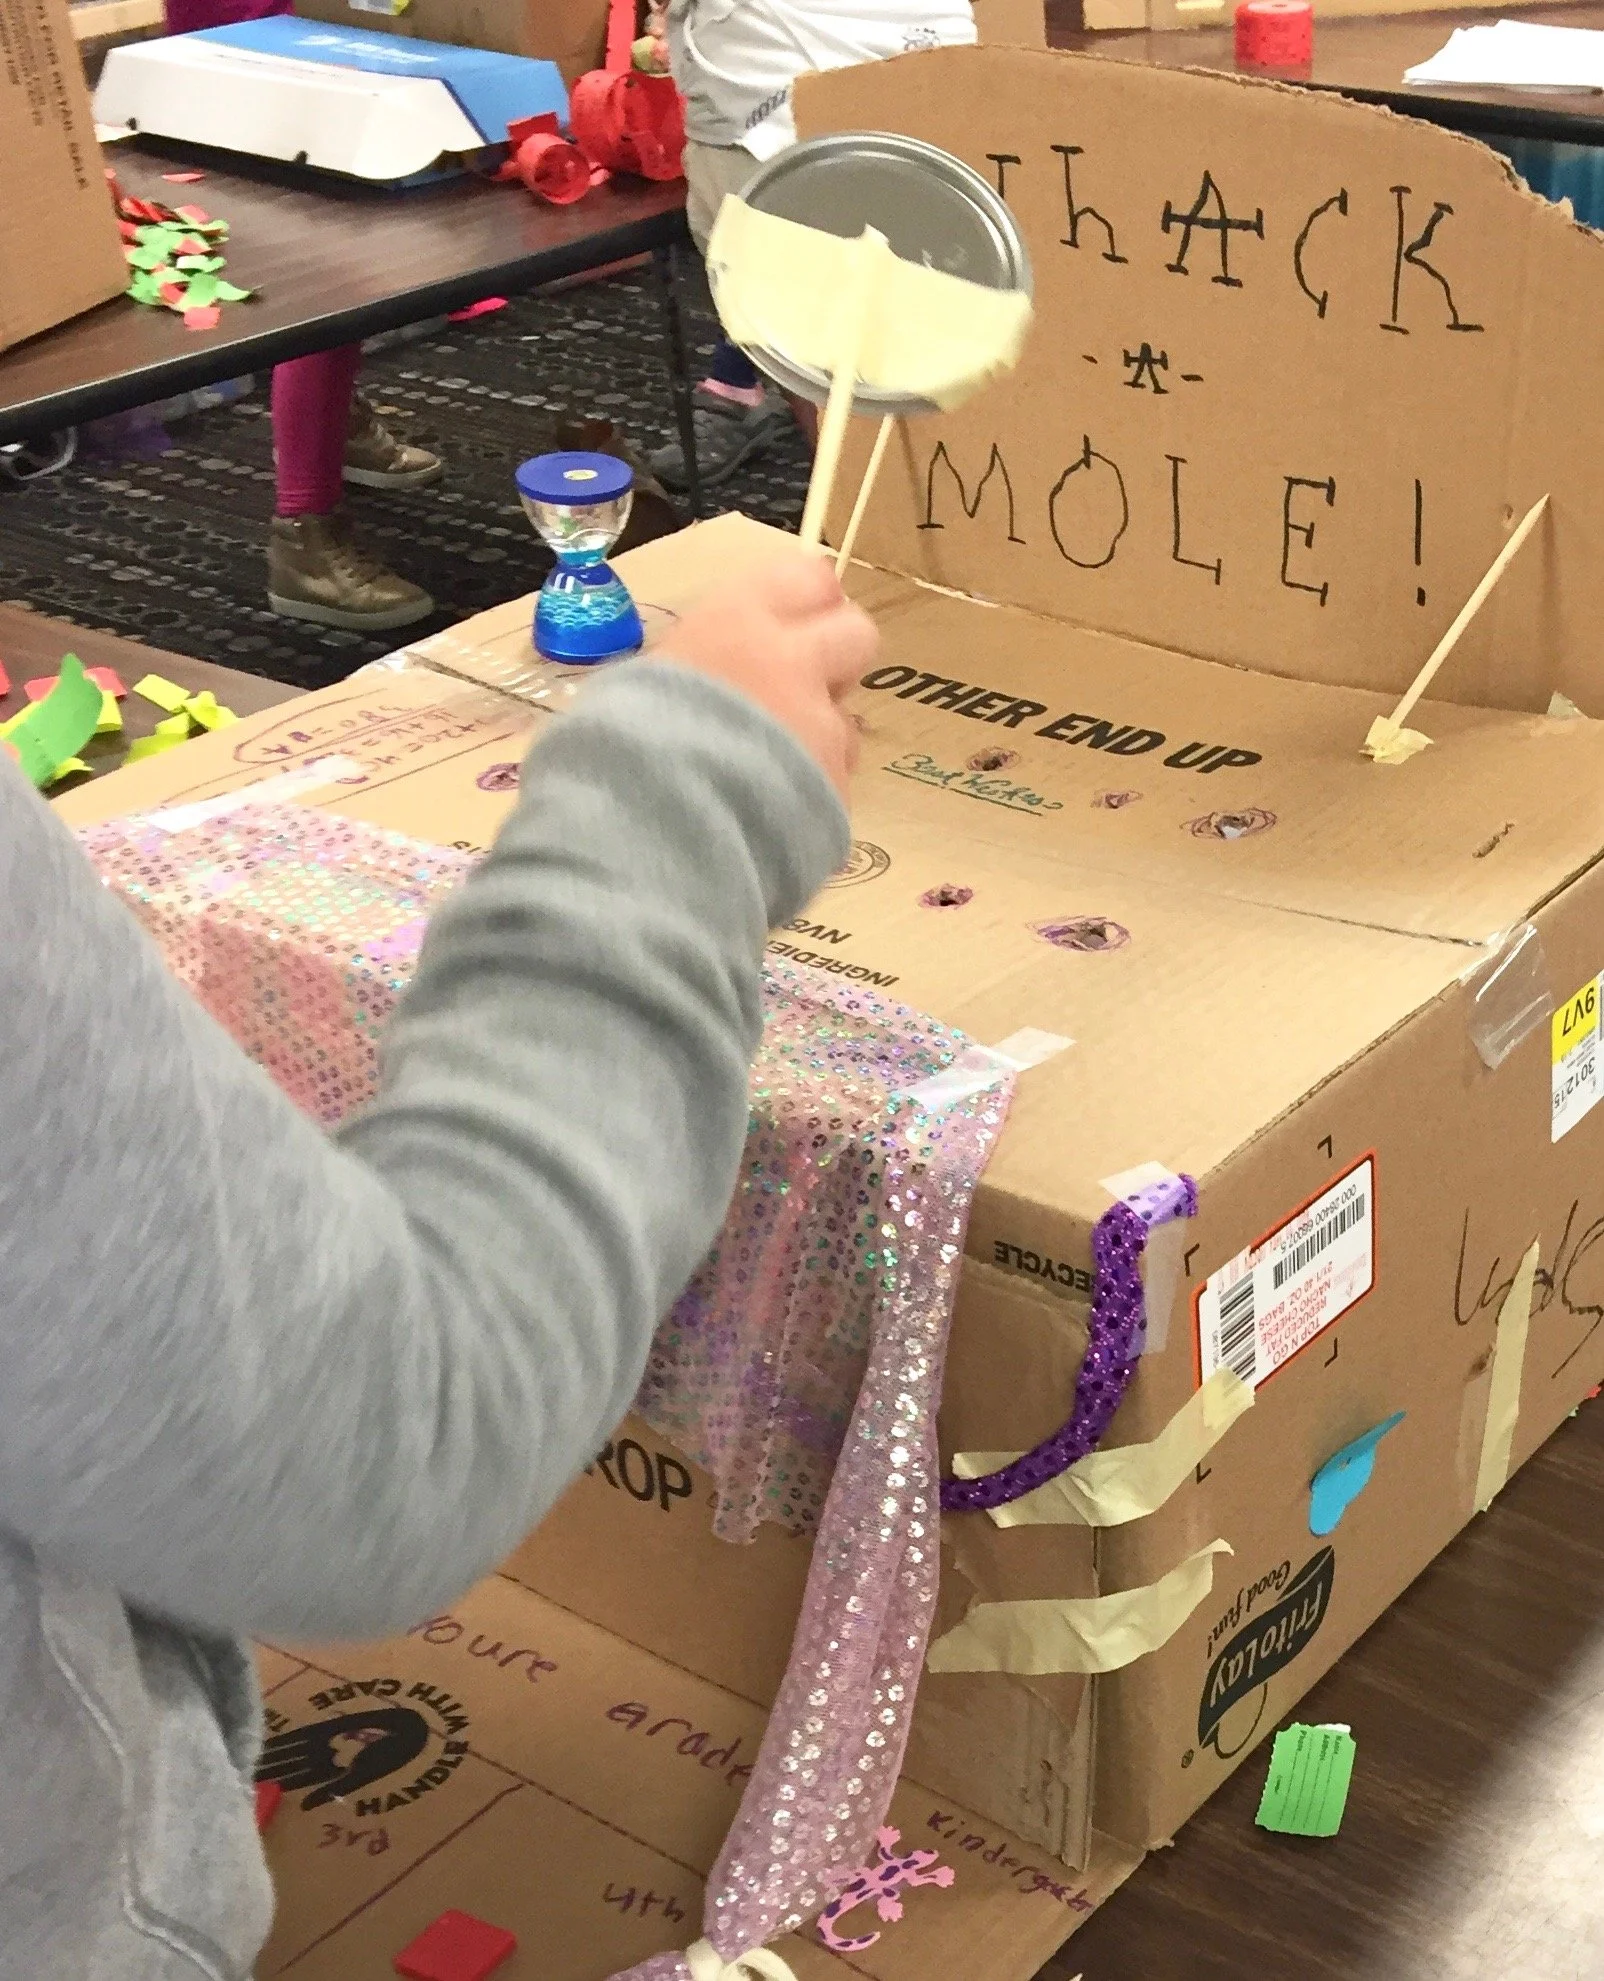
One year right before summer break I had the students do a design project that was based on the story of Caine's Arcade. The students made their own arcade games and invited other classrooms to play. One week into summer I received a message from a parent (who was not in my room) stating that her son was building a cardboard arcade in their garage! She was ecstatic that her son was exploring and creating instead of being plugged into a screen.

However, the students’ creativity will not be limited to arcade games! Cardboard can be an incredibly versatile material for children to explore and create with. It can be transformed into a multitude of shapes and structures, allowing kids to use their imaginations and explore new ideas. Cardboard encourages children to think outside of the box and come up with creative solutions to problems. It's also a great way to introduce them to basic engineering and design principles, while also teaching them the importance of recycling and sustainability. With a little bit of imagination, cardboard can be used to build fortresses, robots, boats, and more!
Reason #3 - There are a lot of different ways to cut, fold, and reshape cardboard
First, you can teach students to look around for shapes they would like to trace. For example, a bowl flipped over makes for an excellent circle template. Or a pencil box can work for a rectangle. Soon you will see the students looking around the room and noticing decoration and supplies that can serve an entirely different purpose.
You can teach students how to cut flaps that open in various ways. If you need a marble to fall out of an opening the flap can open downward. If the students need the flap to serve as a door, it can open to the side.
Students can be taught to create walls or sides with cardboard by using an L-brace. The students place a piece of tape half on/half off the piece of cardboard. They then fold the tape out and place it on the base piece. Students will then repeat these steps on the inside of the wall.

Finally, you can show students how to make one side of a piece of cardboard with a tab and then to create a slot in another piece. Once you insert the tab into the slot you have a secure structure.

Reason #4 - Cardboard and tape can be used in grade level classrooms or for STEAM specials
Both materials are simple for the teacher to gather. No more late night trips to the store to prepare for the next day! They also work well as the main materials when your students are taking part in an Engineering Design challenge. They give students the freedom to design exactly what is in their plan because cardboard can be cut, folded, or attached to create any new design that you can imagine.
All in all, cardboard and tape are great materials to use for a STEM challenge because they are affordable, durable, and versatile. Cardboard is lightweight and can be cut, bent, and shaped into almost any 3D structure, while tape provides strong adhesion to keep the structure together. With cardboard and tape, you can create a wide variety of projects and challenges that will test your students' creativity, problem-solving skills, and engineering knowledge.

Emergency STEM Sub Plans
Already made emergency STEM sub plans. So easy to use because the only building materials needed are tape and paper.
Ugh! Last minute STEM sub plans. Nothing is worse than feeling terrible and having limited time to get a plan together. Plus, the plan needs to include easy STEM activities so directions are a breeze to follow and anyone can teach it. I always pretend that each substitute is entering the classroom for the first time.
Well, I finally have created a solution for the dreaded plan making chore. My emergency STEM sub plans! They are low prep, use only paper as the building material, and have simple, easy to follow activities.

Supplies are a key component when it comes to creating interactive sub plans. In our STEM classroom we have all kinds of cool manipulatives. However, when I'm leaving a lesson for another person to teach, my material of choice is plain, old paper. I have had substitute teachers thank me for using such a simple item. They said they were actually nervous when they were assigned to my classroom because they thought I would be leaving lessons that use robots or another complicated device. Nope, each of the 5 lessons use only paper and tape.
The 5 paper challenges are:
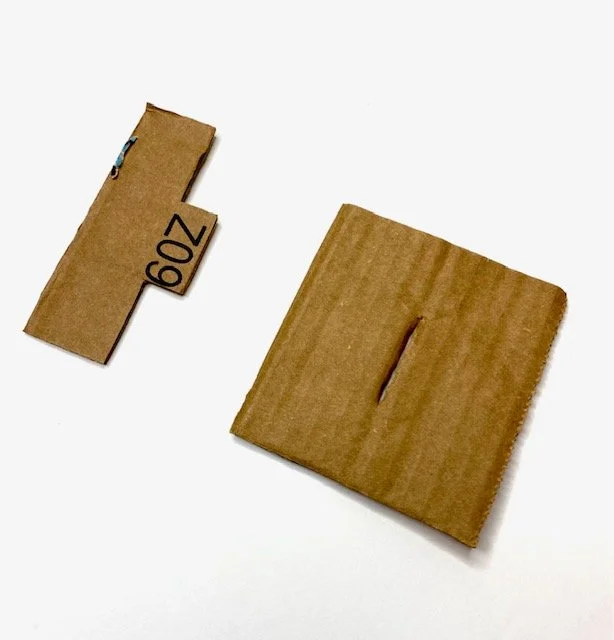
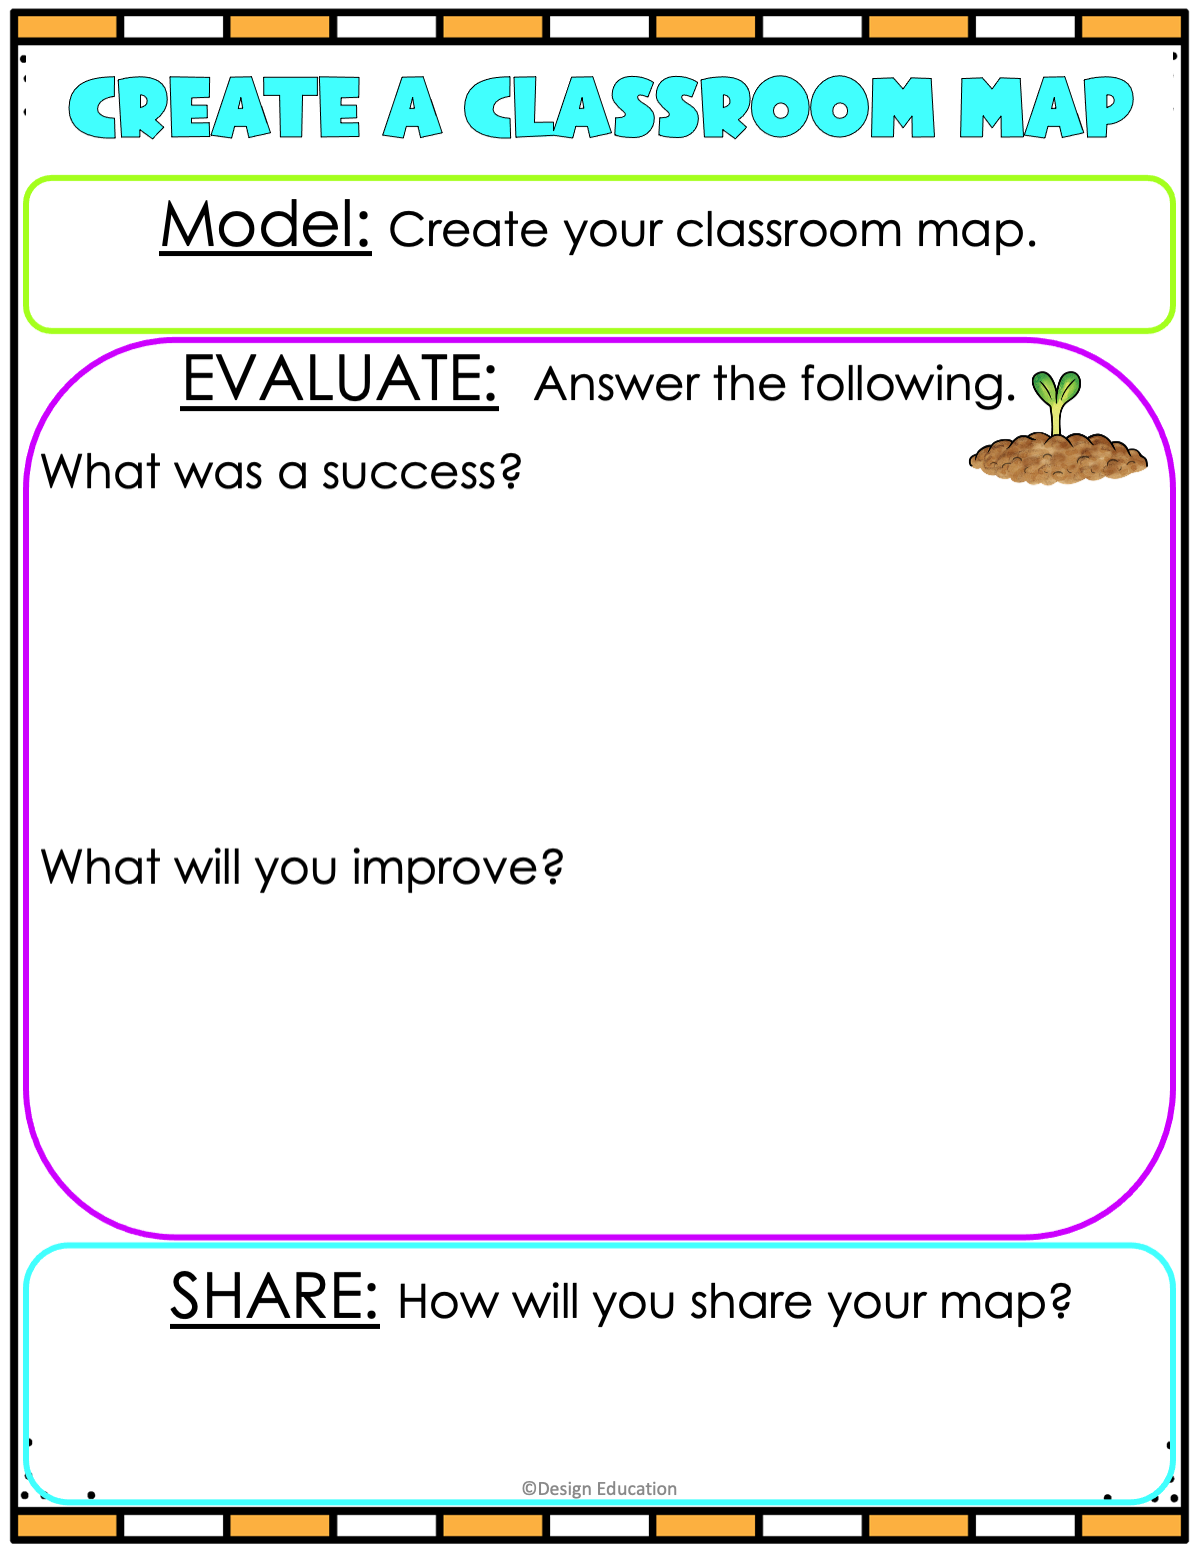
Create a picture
Design a map
Create a maze
Create the longest chain
Create the tallest tower
These lessons also keep the students engaged in meaningful learning. Even though the plans do not follow what we're doing in the curriculum, they still move step-by-step through the Engineering Design Process. This is a fantastic way to quickly review the cycle for my students. They complete a fun challenge as they move through the design process.

During each challenge the students have their own engineering packet. This walks them through what the challenge is and a place to brainstorm ideas. Then the students plan their idea and build a model using paper and tape or glue. The students then evaluate and improve their designs. Finally the students are asked to share their products with the entire class or small groups. Guiding the students step-by-step through the process helps the students remember what to do. It also provides feedback for me about who still needs support or if I need to have a mini lesson on a portion that many students are minimally completing.
All in all plans are important to think through before they are actually needed. Nothing is worse than having a stomach bug and trying to gather last minute plans. I had two main goals when I created the lessons. The first is that the plans are so simple and easy-to-follow that a substitute teacher will want to return to my room. The second goal is that the lessons are meaningful. Since I only see the students every four days I feel like it is a waste to have a throwaway lesson. Using the Engineering Design Process for each challenge gives it purpose.
I hope you never have to use these plans in an actual emergency. However, they can also make a planned day out much easier to take!
If you want to keep in touch, get a freebie, and share everything STEM join my email list here.

STEM Room Decor
I have to admit, I am not one that likes to change my wall decor very often. I know classroom walls need to be meaningful, but updating bulletin boards is often the item on my list that keeps getting moved to the next day. I have found a few simple ways to decorate my classroom that require very little refreshing. The following time saving decoration ideas are too good not to share!
THOUGHTS TO PONDER
Before you determine what to hang on your walls, think about the following questions.
What are the main expectations of your class for the year?
When a child leaves you at the end of the year how will they have grown because of your class?
How will your students be represented in your classroom?
What will your students do when they have finished an activity?
Do you want any of your bulletin boards to be interactive?
If you are ready to transform your room to a teachable decorated space that can last the year I have three ideas to get you started.
DECIDE ON YOUR YEARLY FOCUS
Each year I like to select 4-5 words that will be my focus for the year. It is like New Years but for my classroom. One theme could be to focus on working through challenges. If this is your focus you can select words like: determination, problem-solving, risk-taking, growth, brave, or motivation. Or if your theme is creativity you can select words such as: inspire, unique, innovation, original, resourceful, or imagination. Finally if your focus is on being a maker you can use words such as build, invent, construct, produce, or modify. After you select your focus and your words you will need to design how they will fit together like a scrabble board. You can then use these Scrabble letters. They are easy to use: just print, cut on the dotted line, and arrange them into the board that you will hang on your wall. Each letter has a picture that represents a STEM word that starts with the letter.
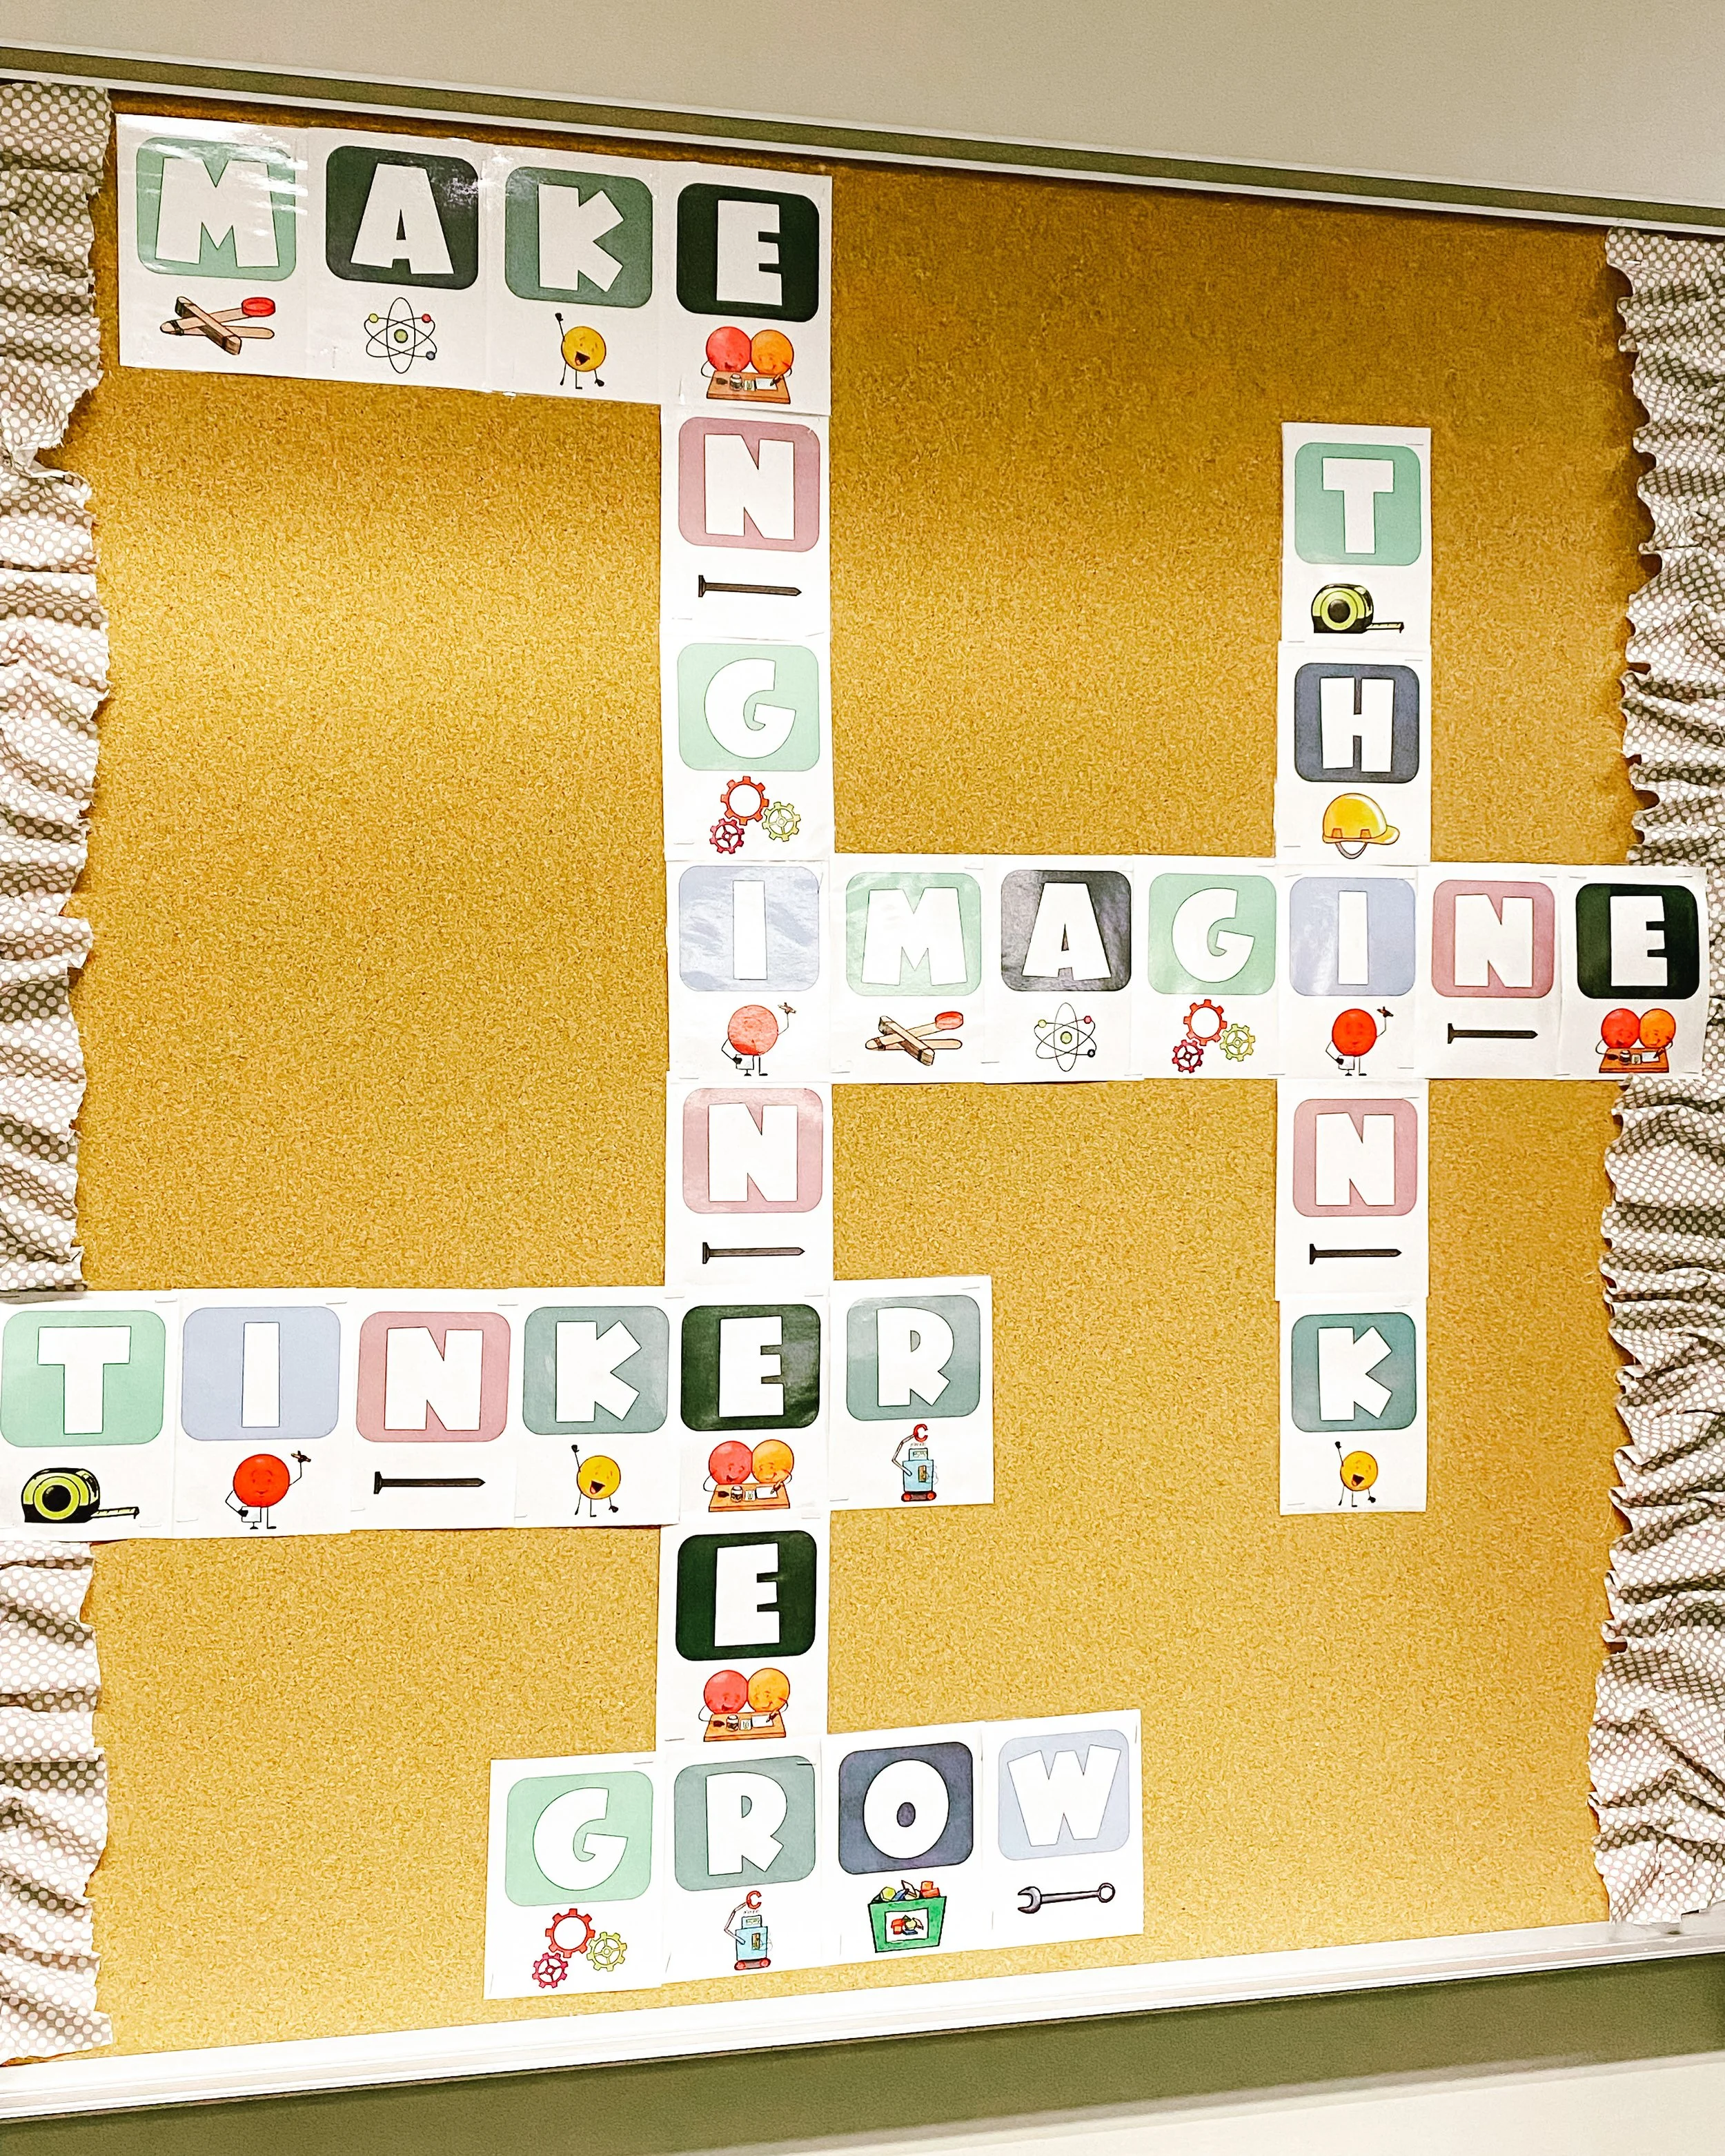
This wall decoration resource encourages students (I often use it too) to reference the big idea of what we are trying to achieve during our year together. It is also kid friendly with the letter written in a friendly font and a picture that goes along with it.
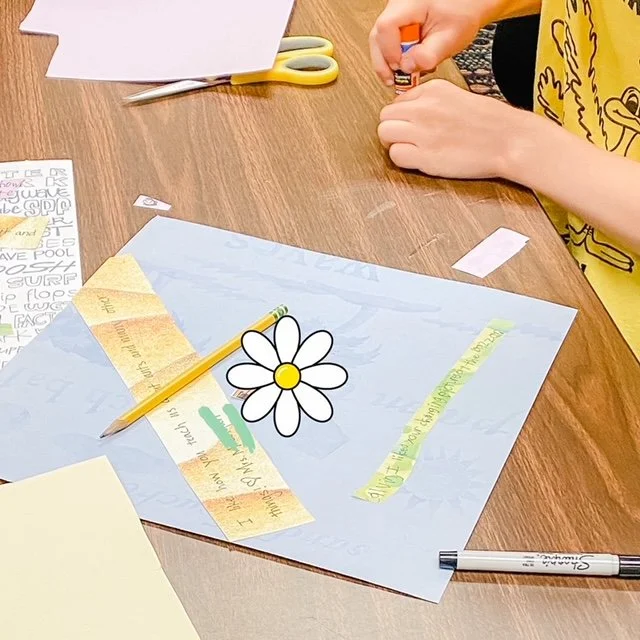
STUDENT CREATED ART
A wonderful beginning of the year activity that allows students to get to know one another is the thinking poster. It is where students draw or paint their thinking. In the corner of the page you can take a picture of the student and glue it down or have the students decorate a face that represents them. Or the students can draw their name in a creative way.
Once a student representation is on the paper they will then section the rest of the page into portions. The students will draw what it is that they think about inside of these sections. I like to brainstorm ideas before the students get started. These thinking representations can be about their likes, concerns, family life, hobbies, dreams, friends, etc. Really anything the students think about is what you are looking for.
These posters are a colorful way the students can introduce themselves to the class. It is also a way for students to connect. I have found that as the students stare at these posters throughout the year they notice connections they have to others that they may not have noticed in the past. It is a beautiful and unique way to decorate your walls.
EXTENSIONS
Another way that I like to decorate my room is with items that can be used as extensions. No matter what the lesson there's bound to be students that finish it early. Having interactive stations around the room that they can move to helps to keep these students engaged.
One extension wall decor is to hang up life size games. This can be checkers or chess with velcro pieces. Or if you have a large magnetic space you can use magnets. I find that magnetic business cards are the easiest way to incorporate magnets into my classroom. They stay flat, are easy to cut to size, and have a sticky backing. These games are perfect when there are 2 or more students who have completed their work. While playing these games students learn how to work with others, how to use strategy, and most importantly they are having fun!
Another extension that I like to hang on the wall is one of my journals. There are 3 different journals that I turn to and they are the Growth Mindset Journal, Maker’s Journal, or Genius Hour Journal. I have pockets that I create out of large pieces of construction paper that I hang on the wall. I then print a few pages from one of the journals and place it inside the pocket. Students can grab their mini journal when they have finished their work. They then hold on to the journal and work on it whenever they finish an assignment. I will randomly check in on their progress when I have a couple of minutes to make sure they are creating thoughtful responses.
I hope one of these wall decor ideas will work for your classroom. Creating displays that can last most of the year takes one more “to do” off of your busy teacher list! Plus, having boards that students can use is a win-win!
If you want more classroom tips and to receive a set of free Engineering Design posters join my email list here.
Wishing you the best year yet!
A Fun STEM Activity for the First Day of School
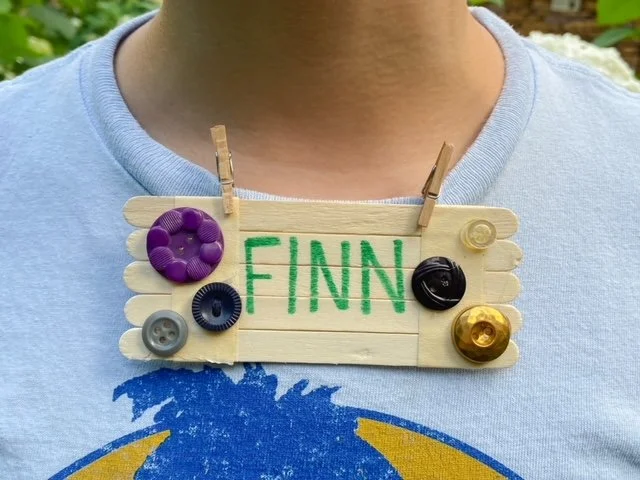
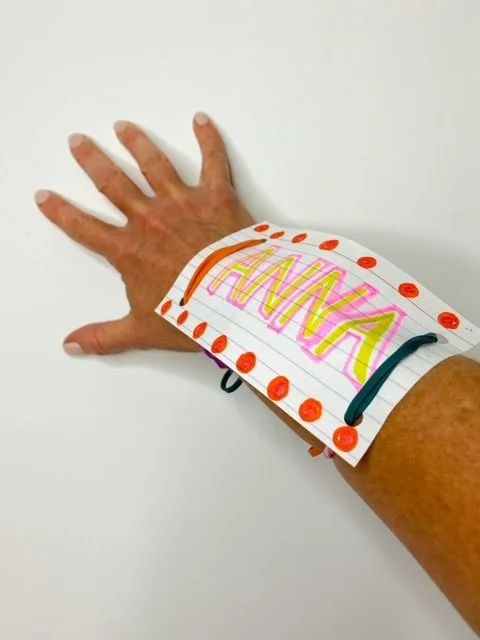
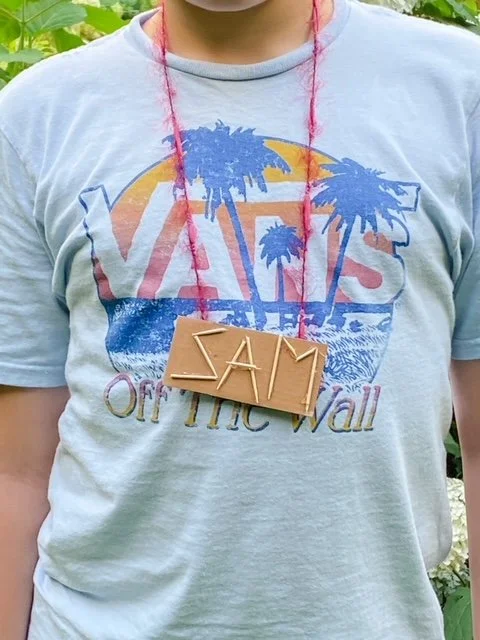
Do you want to have your students complete a meaningful STEM challenge on the first day of class? How will they get supplies? How will they use the supplies? And how will they know the Engineering Design Process without any instruction? Well, I’ve got you! This post will explain how elementary students can complete an easy name tag STEM activity on the very first day of class.

This fun STEM challenge will have the students create a name tag that they can wear. Seems simple right? It is because the students will be so engaged that you will have the chance to observe how they design and ask them questions. However, it will also be challenging for the students because there are some building constraints. For example, they are going to be given limited supplies, have the time limit of one class period, and they must make their name tag easily visible.
The name tag project should be completed on the first or second day of your elementary STEAM class. The challenge serves many purposes such as introducing the students to the Engineering Design Process, allowing you to learn names, and creating such an engaging environment that your students will be begging to return to your class. All of these purposes are very important to address from the start.
Your students will complete this simple STEAM challenge in one class period. Begin by introducing the challenge to the class and explaining the expectations/constraints. (Here is a resource to walk you through it). You will address classroom procedures as they arise throughout the project. For example, discuss how a student must raise their hand when they have a question. Or as the students move to the tables/desks you can model what this looks like. Also, when interacting with materials you can share your expectations and model examples of appropriate behavior.
If the students finish early you can have them share their name tag, how/where they will attach it to their body, and why they used the materials they selected. At the end of class collect the name tags so the students can use them for your first month of class.

If you want student engineering pages and step-by-step instructions you can find them here.
As far as materials go you can divide them up in various ways.
You can give each student the same amount and same type of materials. For example, a student could have a baggie that has an index card, wine cork, 1 clothespin, a cardboard tube, and a couple of random toy pieces.
You can set materials on a table and discuss how students will work together to share the materials.
You can hand out baggies to students that contain different things. If you do this, determine ahead of time if you are going to allow the students to trade items.
You can also set out different materials at each table so 1 table is working with 6 items that another table does not have.
This is an easy challenge to differentiate. One way is to have the constraint of not being able to make the name tag into a necklace. Also, the more you limit the supplies the more challenging this STEAM challenge will be. Another way to differentiate is to determine if the students will use items that will easily attach their name tag to their body such as tape, clothes pins, string, etc.
The engagement you are going to see in your students during this project will amaze you! Participating in this type of challenge right out of the gate sends many positive messages. In your class students are going to be required to think outside of the box, there is not just one right answer, and the students need to collaborate to be successful!
Here’s to your best year yet!

P.S. If you are looking for free STEM goodies connect with me here!
Setting Up A STEM Space For The New School Year
Are you wondering what to include in your STEM space for the year? It can be overwhelming to know where to begin. Read on for my personal plan of where to begin. I will share exactly what I am starting with in hopes that it makes your organization a little easier.
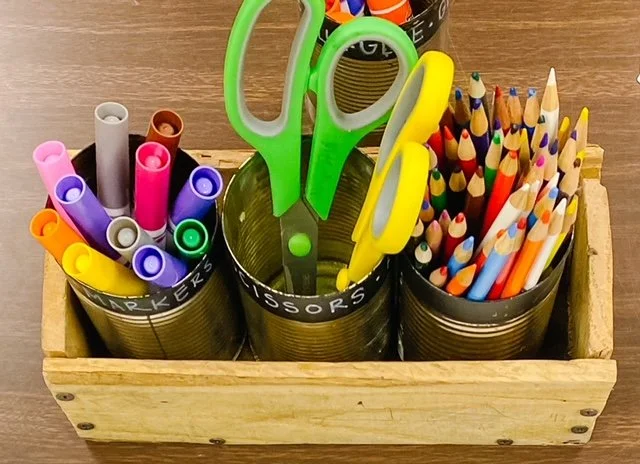
Student Supplies: The first thing that I think about is how I am going to store the supplies the students will use each day. I do not have a huge budget so the cheaper the bins/organizers, the better! This is where recyclable materials come in. Each day the students will use scissors, markers, and glue sticks. I plan to organize these on the tables in used and cleaned soup/vegetable cans. I save these as I cook during the summer. I have 6 tables and each table needs at least 3 cans, this means at least 18 cans will be needed for the year. In order to keep the cans neat I have built rectangular wood caddies that will fit the cans.
*It is important to make sure there isn’t any metal sticking out of the cans and that the wood on the caddy is sanded smooth.*
Classroom Walls: As for my classroom walls I like to have at least one wall that will remain the same throughout the year. One of my focuses this year is developing a growth mindset in every student. I plan to use this poster set to display aspects we touch on throughout the year. I went to my local dollar store and purchased 12 black frames. I am going to arrange 12 of these posters in a 2 by 6 array.

I will also use my Growth Mindset Journal to address the concepts in the posters throughout the year. After we discuss the specific concept the corresponding journal page will be used as an extension for early finishers. I love how simple and to the point the posters are. This will allow students to internalize the concepts and they will easily be able to read the sayings from across the room!
Teacher Setup: As for myself there are a few items that are a must have. The first is that I have a wooden caddy (a bigger version of what I use with the students) on my desk. Inside the caddie I will use the same soup/vegetable cans to organize pens, pencils, markers, staple remover, and any office supplies that I use regularly.
I also need to locate and set up my plan book. I do not use anything fancy. Just the generic one my district provides for me. The more simple the better is my opinion.
Finally, I will create a binder with all of my “must have” forms. The first section will be for class lists because I will be teaching all of the classes in the building. Then a seating chart for each class, a copy of my daily schedule, the school phone number list, and all of the drill procedures. Finally, I will have my class expectations, the four Cs - critical thinking, collaboration, creativity and communication.
All in all, having a general list of the “basics” that I need to help me begin in August allows me to clear my head and begin focusing on the details. I consider this list the jumping off point for student supplies, wall decor, and teacher tools.
First Day of STEM Class Lesson Plan for Lower Elementary
Quick Summary
This is my plan for day one of lower Elementary STEM class. This lesson plan focuses on the question “Why is a STEM class important?” It includes a mini lesson, exploration time, and a discussion. My goal is that the students will leave the room excited to return with their curiosity piqued from the hands-on exploration.
If you would like a pdf version of this plan you can find it here.

Who: This is a lesson I have created for my jr. kindergarten through second grade STEAM students. I plan to always address the importance of STEM in every class I teach. This is so the students see that the engineering design process is more than just crafting. My goal of the entire first lesson is that the students exit knowing there will never be just one solution to a problem. I know lofty goals for lower elementary, but shoot for the moon right?!?
When: I plan to deliver this lesson on my first day with the students. Since STEAM is a special in my building, I will only see the students every four days. I plan to have my first few lessons complete during each period. I do not want my lessons to take more than one class period during the first few weeks due to the students’ ages and attention spans.
Where: I hope to be in my own room on day 1 but there is a possibility I will be on a cart. I feel so lucky because my district is completely renovating the STEAM centers in all buildings. However, there is a large probability that I will be on a cart because the renovations will not be complete. I am accounting for this in my plans. All of my introductory lessons will include minimal materials and wrap up in one day.
What: This lesson begins by having me share a little about myself. Connecting with the students is so important. Behavior issues that arise later in the year are always easier if the students know who I am and vice versa. Then I will share one of my favorite read alouds.

Then we will discuss the purpose of STEM class, which is to explore and find new solutions to problems. To do this we will have to work with one another and really communicate our ideas.
Students will then practice the procedure of moving from the whole group on the carpet to the tables. We will discuss what moving around the classroom should look like. Finally at their seats they will find cut pieces of cardboard and masking tape. They will use this material to build any structure/idea they would like. I will also show the students how to use masking tape.
As the students work I will randomly stop them to share ideas and what they notice. I will use this time to answer questions that may arise.
During the last 10 minutes of class I will hand out name tags to the students. These will already have the student’s name on them, in case some of my younger students do not know how to write their names. I will have the students draw a symbol that reminds them of STEM class. We will again share as time permits.
If anyone finishes early, I will have the tinkering journals ready to go. However, I will not introduce this idea to the entire class yet.
How: All in all, I love to have each introduction day over planned. It’s not a problem if I do not get to all of the aspects. However, it’s a large issue if there isn’t enough planned. I will continue to share where I go from here and what my plans are for upper elementary. Check back often if this type of plan works for you!

Would you like a pdf of the plan? You will find it here.
End of the Year Activity and Gift
Will I make it to the end of the year? 🥺
You’re probably asking yourself this same question. The end of the year is hard for both teachers and students. In the last week alone, my son underwent surgery to get one of his ear tubes pulled out. We had six total hockey practices plus 3 games. 3 soccer practices and one game. A fourth grade music performance, I needed a mammogram, an after school district meeting, and a hair appointment. This is just what is happening outside of school hours and does not take into account the planning, grading, assessing, end of your tests, parent emails, program changes oh, and perhaps the most exhausting...playground disagreements Every.Single.Day. It seems I can never begin math on time because I have to help students through another dilemma!
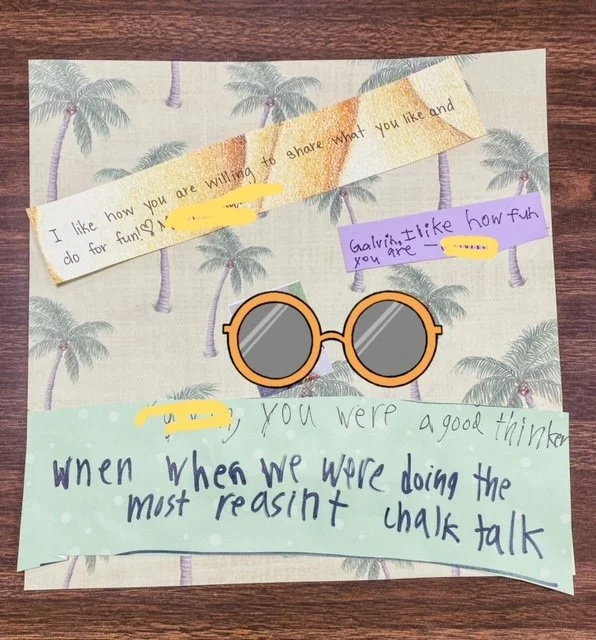
To make my life easier and more streamlined I have created a student activity, the name compliment plate, that doubles as the gift/keepsake for the year. The beauty of this idea is that the students create it! There is absolutely no after school hours needed. I have used this project with second, third, and fourth graders successfully. As soon as the students have finished recording compliments for their peers, they then return to their plate and begin reading intently. Many want to share the compliments aloud while others read silently with a small smile on their face. I even had a fourth grader begin to tear up because he was so surprised that his classmates felt so positively about him.
Follow the following steps to recreate this simple end of the year gift for your students:
Give each child a piece of paper. It can be any color just make sure you can easily see the marker or the writing utensil you will use on it.
Instruct the students to write their own name in the middle, they can use fancy lettering if they would like.
Students will then leave their paper at their seat.
Students will rotate around the room and record detailed compliments on each of their classmates’ papers.
It is important to explain to the students that each compliment needs to be specific to the child. I give a couple of examples such as, “I like the way you lended me your eraser when I didn’t have one.” Or, “You are kind to everyone, even if the person is not your closest friend.” I then allow the students to give examples. As they share examples, I listen to make sure the compliments are detailed.
After that we have a discussion about how it would feel to have a silly or mean message on our papers. The students share how they would feel. I also chime in with how it would make me feel if I had a mean message (I also have a paper out with my name on it). In all of the years I have completed this activity I have never had an issue with inappropriate messages. As the students are leaving compliments for one another I also rotate around the room. I leave compliments AND read messages so I can address any problems that might arise.
Students can move from one compliment plate to another at their own place. For example, one student may record 3 different compliments in the time it takes someone else to record one compliment. This does mean that some students will not get to all papers and I am okay with that. To make sure each paper has many compliments I monitor as I am moving around the room. If I notice a paper that is not getting much activity I encourage a child to move to it.
Once the name compliment plates are full I instruct the students to return to their own. This is when I see smiles spread across students' faces. Some children want to share what was written while others like to treasure the comments by themselves. All students are head over heels excited to take their end of the year gift home!
This easy yet meaningful project is a win-win in my book!
I hope you find this activity creates connection and full hearts before break. If you want to learn more about how I use growth mindset in the classroom room checkout this post.
Summer Bucket List For Kids
Family bucket list for kids
Ahh summer how I have missed you!
Do you ever get to the middle of summer and run out of ideas to do with your kids? Or do you feel that you are constantly repeating the same activities over and over? This happens to us every.single.summer. That's why I have decided to create a summer bucket list of activities we can take part in as a family.
In this post, I will share:
Why I feel a bucket list is important
When I plan on using the bucket list activities
My BUCKET LIST!
Side note…I love being in the moment and having a growth mindset is helping me to do so. Click here for an awesome growth mindset freebie.
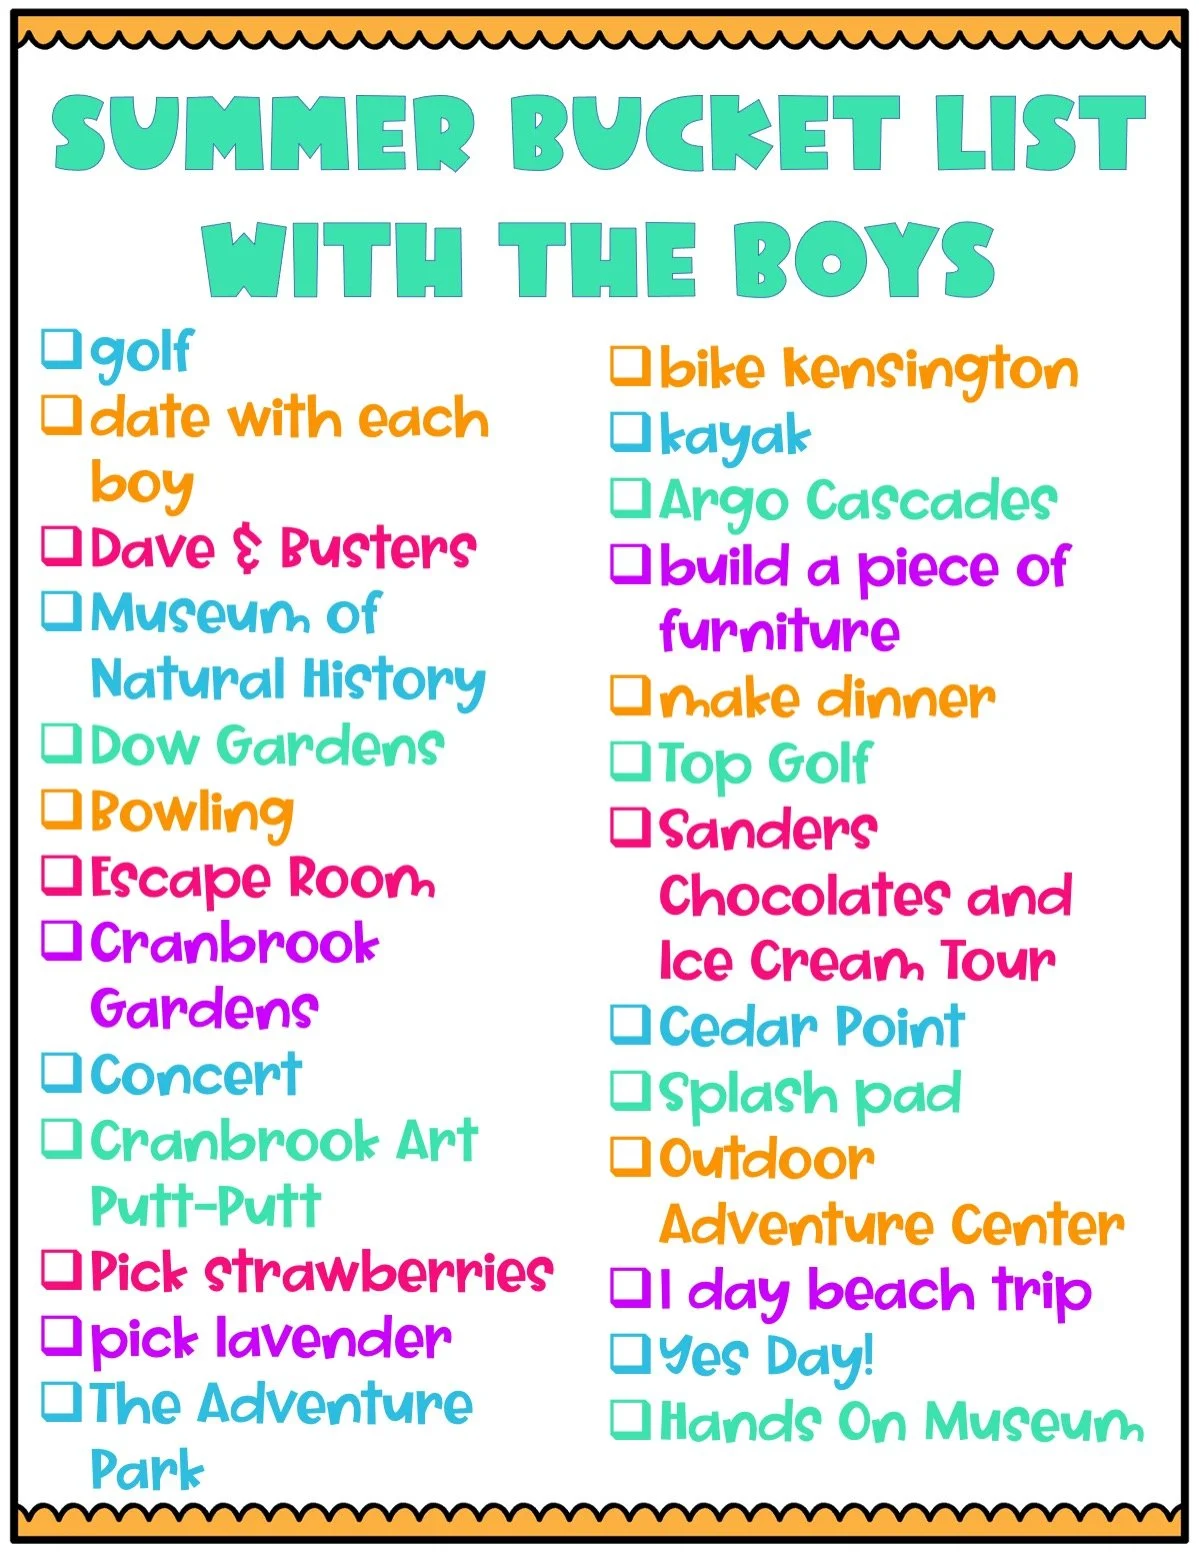
Grab your copy of this bucket list for kids here.
You might be wondering why you need to have your summer activities recorder on a checklist. The main reason I created this list is because I want to make the most of this time with my boys. It’s also my goal to practice being present and being in the moment this summer. I want to become more mindful so I hear everything my boys say, not just saying yes or uh huh and moving on. I want to have more actual conversations. Finally, I do not want the summer to slip by. I know it's going to go fast. However, being mindful may make it feel just a little longer.
Being mindful this summer will take sticking loosely to a schedule. My goal is to complete 2 - 3 outings a week. At this rate I might not get through all of the activities on my list and that's okay. I may have to continue to remind myself that it really is okay! :-) Along with the bucket list activities, I plan on completing one stem activity with the boys a week. This will consist of using mostly recyclable materials and exploring 1 concept at a time. I also would like to have a 20-minute reading time each day. This will be a time that we all stop what we are doing and quietly read whatever it is we would like to read. I hope this instills the love of reading into each of my children. Besides that I also want to have one family game a week and one movie night a week. I feel like this doesn't look like much on paper. However, they feel like lofty goals. I plan on using a habit tracker in my calendar to help keep me accountable.
A breakdown of my summer week:
Two to three bucket list activities
One STEM activity
Five days of 20 minute reading block
One family game
One movie night
Family Summer Habit Tracker
All in all, my goal is to enjoy the summer and get to know my boys even better than I do now. I know it's the relationships we form at this time in their lives that will continue into adulthood. Now…let's put this summer bucket list to use!
Top 3 Growth Mindset Read-Alouds for Children
Have your students been struggling with working through challenges? When my room takes on a negative tone I make sure to focus on growth mindset. One of my most effective strategies is to incorporate read-alouds that include characters who persist through failures. I have included my top 3 growth mindset read-alouds. These are my favorite because students hang on every word and the discussions that follow are very insightful.
Your students will be believing in themselves and supporting one another as they take on harder and harder challenges.
Read on to discover the top 3 read-alouds I use to encourage a growth mindset in my classroom. For each title I will include:
The author
A summary
Why the story is important
Follow this link to explore other resources I use to increase student motivation.
1. Salt In His Shoes by Deloris Jordan
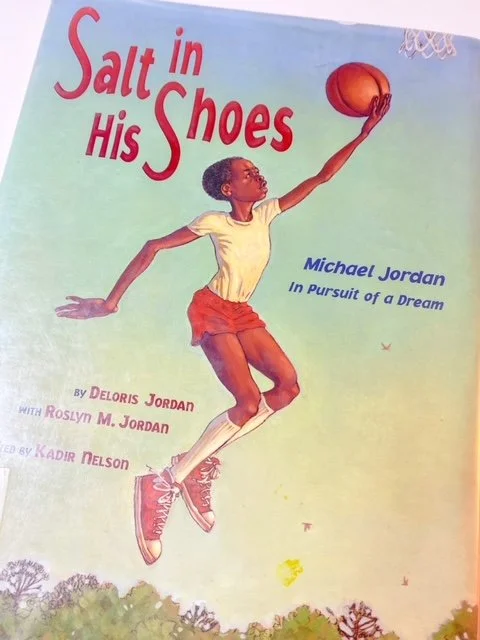
This has been one of my favorite growth mindset books for a long time. Salt In His Shoes by Deloris Jordan is a picture book about Michael Jordan, the famous Chicago Bulls basketball player. This book tells the story of how as a little boy Michael would go to the basketball court with his brothers and play with his older brother's friends. There was one boy who would pick on Michael for being small and not a good player. Michael was upset and thought if he was only taller he would be better so he asked his mom how to grow. His mom tells him to put salt in his shoes and to pray. His dad then explains that practice, determination, and believing in yourself will get you there. After a summer of practicing Michael joins his brothers and their friends on the basketball court. He has improved so much he scores the game winning point. This story is a great example of a character believing that he could do it and working hard to achieve his goals.
Why This Book Is Important
This book has always been a high interest story in my classroom. The students know who Michael Jordan is and are surprised that he wasn't always the best player on the court. It demonstrates that what people say to themselves is important. Your thoughts can either diminish your dreams or help you to achieve them. My students and I always use this as a jumping-off point to brainstorm positive affirmations that we can say to ourselves.
2. Papa's Mechanical Fish by Candace Fleming
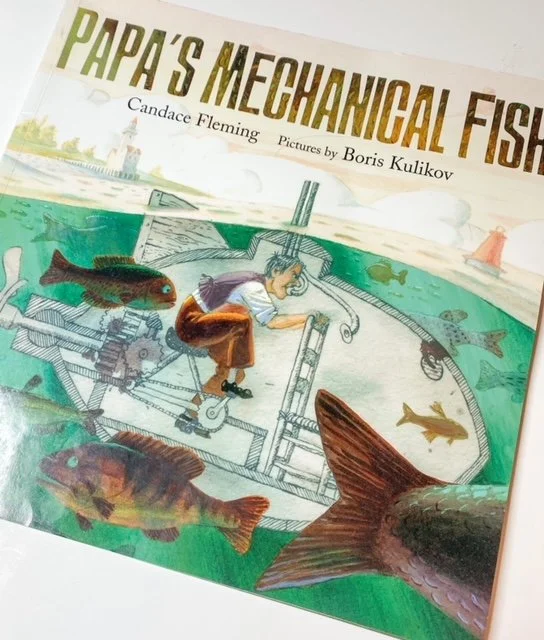
Papa’s Mechanical Fish by Candace Fleming is a fictional story that is loosely based on the inventor name Lodner Phillips. He was a tinkerer and a designer that created a submarine. This story shows how to persevere when the first few attempts fail. Lodner did not give up, instead was quoted as saying, “It almost worked!” I love how this is a positive way of looking at a model that didn't work the way you wanted it to.
Why This Book Is Important
Papa's Mechanical Fish is an important read aloud because it demonstrates a person with a great mind who has to also use persistence. His success did not come easily nor on the first attempt. This is an important lesson for students who tend to be perfectionists or shut down easily when a challenge arises. Students not only reflect on Papa’s reactions to the failures but also to his family's reactions. Papa’s family continues to support Papa each time he changes his model and tests it in Lake Michigan. No one doubted or worried that it would not work. This is such an important growth mindset idea to share with your students. We need to be positive about our own thinking and designs, we also need to support others and their thinking.
3. The Magical Yet by Angela DiTerlizzi
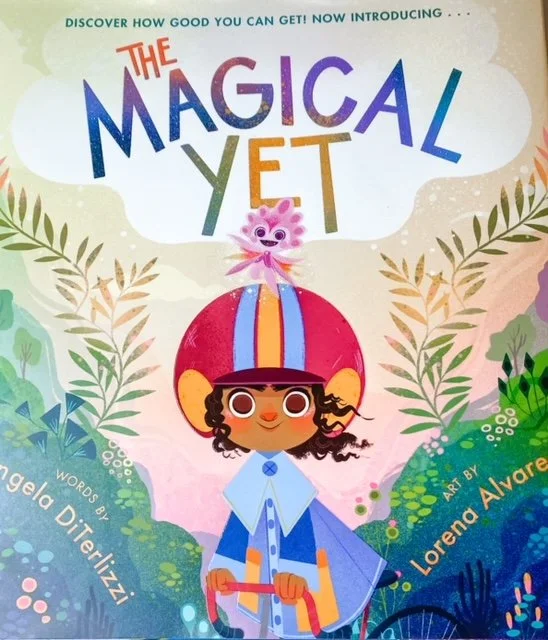
The Magical Yet by Angela DiTerlizzi is an excellent book that addresses growth mindset. It begins with a child that can’t ride her bike and she becomes so frustrated that she refuses to try again, she will walk for the rest of her days. Then she discovers her magical yet that takes the shape of a magical fairy. This yet reminds the child about how she couldn’t walk at first but she never gave up and how she babbled before she could talk. The yet explains that goals might not happen immediately but with patience and practice the child will achieve her goals in time.
Why This Book Is Important
The Magical Yet is important because it addresses that throughout our entire life we need to believe in the power of yet. It is a powerful reminder that working hard and believing in yourself will allow you to reach your goals. I have had students draw and build their own magical yets. These are adorable to hang on the wall or display around the room. Having the yets in the classroom also encourages me to talk about them constantly. The more I talk about the power of yet, the more I hear other students referencing the power of yet. When a child says they can’t do an activity, I hear a friend say, “You just can’t do it yet.” I always take that as a huge growth mindset win!

Growth mindset is a topic I am constantly revisiting in my classroom. It is important that the students talk about their thinking and share strategies with their classmates. Perhaps the most impactful activity is leading a discussion about growth mindset by reflecting on a character in a book. These 3 growth mindset titles are amazing at telling a story about a character who had to struggle before they became great. Such important role models of growth mindset found in these 3 titles.
Checkout my 5 ways to increase growth mindset resource. These are easy, ready to use strategies to get you started on your growth mindset journey.
Keep on growing!
Top 3 Read Alouds for Elementary STEM Class
Introducing STEM to your class can be daunting! Engineering is such a different way of teaching that elementary students may have a hard time envisioning themselves learning this way. That is why I have put together a list of my 3 all-time favorite read alouds to introduce STEM curriculum. The following books can be used in the beginning of the year, before you introduce a specific engineering project, or as students need a reminder of how to problem solve while learning.
The following book choices will leave your students feeling excited and asking for challenges!
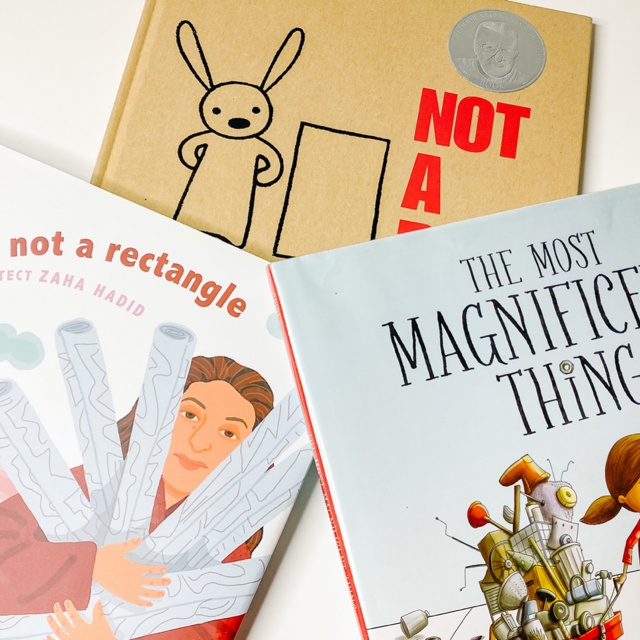
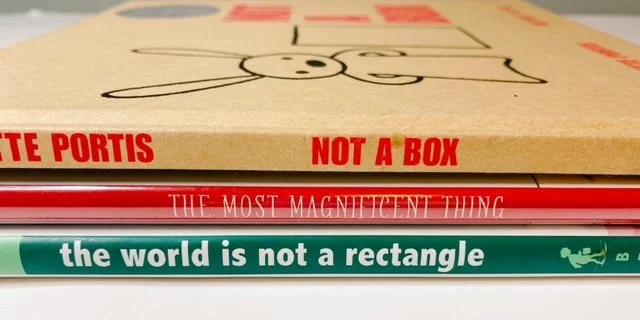
For example, Not A Box by Antoinette Portis is a book I will be sharing in this post. I have read this with all elementary grades ranging from junior kindergarten to fourth grade. All of the students absolutely love this book and hang on every word! It gets them thinking of new and creative ways to use everyday items. The students love guessing what the creative rabbit has done with the box. A few weeks ago a junior kindergartener stopped by my room (this was five months after I had read it to his class) and asked, “Do you remember that Not A Box book? Well it's still my favorite!” I couldn't have been happier. I agreed that it’s one of my favorite books too and he skipped away to his classroom.
Read on as I share three of my favorite books to introduce problem solving and engineering in my STEM classroom. For each title I will include a book summary, why I feel the book is a great way to kick off your STEM curriculum, and an example of a talking point I use with my students.
If you are a STEM teacher you must grab this amazing freebie! These are Engineering Design Process posters that I have hanging on my classroom wall. Follow this link to grab your own copy.
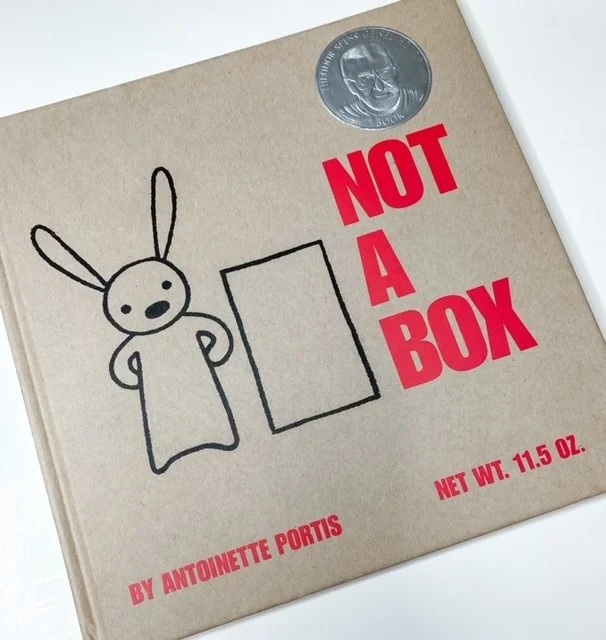
The first book I use to introduce STEM is Not A Box by Antoinette Portis. It is about a rabbit who does all kinds of creative things with a cardboard box. He stands on it, he squirts it, he wears it, etc. After you see what he is doing to the box you turn the page to see what the rabbit is imagining. He imagines the box as a mountain, a building on fire, or that it has become a robot. The students love reading Not A Box interactively. I always ask the question in the book such as, “Why are you standing on top of the box?” I then turn the page and the students shout out what the rabbit has imagined. Even my 4th graders get into this!
The talking point that I love to bring up with students is how everyday items can be used in new and unusual ways. It's important to look beyond a material’s typical use. We then discuss how we will use everyday items to build models to solve problems. This is a simple book that gets the students excited and motivated to engineer.
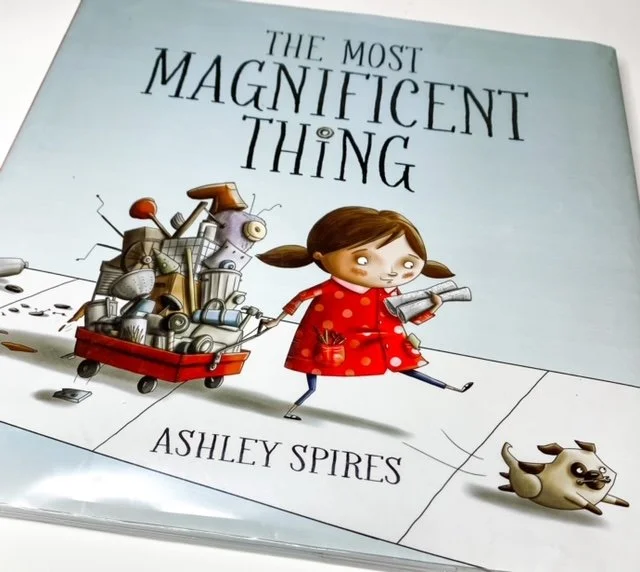
The second book that I have used to introduce STEM activities is the Most Magnificent Thing by Ashley Spires. This is a story of a little girl and her sidekick dog. They are trying to build the most magnificent thing they can. She goes through many versions of making her model but nothing is right. She gets so frustrated she wants to give up. The little girl decides it is better to take a break. This is when she realizes that each model she has built has something that she can use, something that really worked. If she takes all of the successful parts and puts them together she will have the most magnificent thing!
I absolutely love this book because it shows that engineers don't just stick with the very first solution. They think and build, think and build, evaluating along the way. It is a great example that one and done is usually not your best work. It takes many attempts to come up with a solution you are proud of.
This is an important book that I share for two reasons. The first is to reinforce a growth mindset. The students need to recognize great things aren't just planned, built, and shared. Rather great ideas are reworked and reimagined to make them great. The second reason I share this book is because it focuses on the Engineering Design Process. This book shows that engineering is a cycle. That we must move back and forth through the steps to come up with successful solutions.
The message or talking point that I use with my students is that it's important to evaluate your designs to determine what you want to keep and what you want to improve. Engineering is a journey. Now that we have a STEM classroom we will be required to use creativity, persistence, and problem solving. When we put all of this into place we will be creating the most magnificent thing!
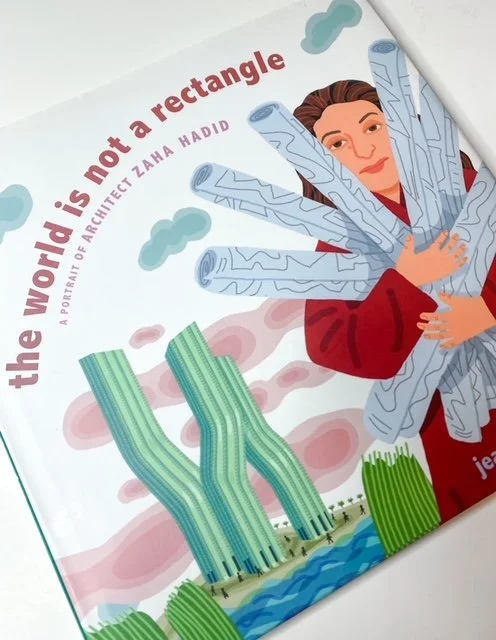
The last STEM book that I would like to mention is The World Is Not A Rectangle by Jeanette Winter. I love this book because it shows how Zaha Hadid used nature as an inspiration for her architecture. The story begins with how Zaha would enter design competitions and win. Then the cities would deny her the opportunity to have her buildings built. However, Zaha kept trying. Finally, after struggling through the process more than once Zaha is able to build her designs. The book then shows an illustration of a natural item that inspired Zaha along with the building she built based on that inspiration. My students are always amazed at how creative and unique her designs are. I then take the time to display real photographs of the buildings found in this book (the book is entirely illustrated). The last page goes through each of Zaha’s buildings and states its name and location. This makes the architecture easy to find online.
The World Is Not A Rectangle is important because it demonstrates a career, being an architect, that uses STEM. Even better, it shows a woman who had to face many obstacles to become a successful architect. A fantastic example of a real world growth mindset! I absolutely love the discussions that develop from this book. One of the main messages I always focus on with my students is to use nature as your inspiration. Everything in nature has a purpose and is useful. Students should use nature to help develop their own solutions.
These three books are a staple in my STEM teaching. I have read them with all elementary grade levels. All of the students I have shared these titles with hang on every word. The stories encourage excitement, motivation, and growth mindset which I can refer back to as we move forward. The books also bring STEM thinking and the Engineering Design Process to life!
If you would like more resources about engineering in your classroom please follow this link.
Until Next Time,

A Design Studio…Your School and Families Will Be Hooked!
Design Studios, aka makerspaces, allow students to use recyclable materials to create working models. Students can use this engineering during any subject math, reading, science, social studies, writing, etc. A design studio will increase your students’ engagement, creativity, and problem solving skills.
Having a Design Studio will completely change the way you view your teaching practice and students view your classroom. Get ready for the excitement!
In 20 years of teaching, creating a Design Studio is the most important change I have made! However, it wasn’t always easy to get everyone onboard. At first I had others doubting the validity of using this resource in my room. I was asked questions about how I had time to do so many art projects. Well, I wasn’t using the supplies for art, I was using it for engineering that resulted in powerful learning opportunities.
Read on to discover how I gained support for my Design Studio from colleagues at school and students’ families.
Click here if you would like a free set of engineering posters to display.
School
In order to get my school colleagues believing in the importance of a Design StudioI constantly talked about using engineering and how the students loved the process. I explained how powerful the learning was and shared how little I had to do for setup. Those coworkers who were interested asked more questions and eventually started to implement engineering in their own classrooms. Many began by using the same projects I had already used in my own classroom.
I also traded classes with a few of my coworkers. They would take my class for something they felt comfortable teaching such as ELA and I would take their students step-by-step through an engineering project. For one of the rooms I lead this cardboard challenge. If you have never seen the YouTube video Caine’s Arcade you must check it out now! The students were so inspired and excited, my coworker was hooked! Now we brainstorm engineering projects together and it makes our instruction that much stronger.
Our school also holds a STEM night once a year. I have opened up my classroom each time. Visitors were encouraged to take part in a free build or a simple challenge. These challenges have included building the tallest tower they can only using paper or to create a bridge that’s at least 1 foot long and would hold up a textbook. Coworkers who attended STEM Night stopped by and could feel the excitement in my room. They also witnessed the important learning that was going on. Students and their families were engrossed in deep conversations, not even noticing who entered the room. This also led to interest with families who came to visit. More on that below…
Families
As I mentioned, STEM Night also got families excited and asking for more engineering in the classroom. Each year when the special night is offered I open up my room and I welcome in families. The students were ecstatic to try and solve a problem with their family’s help! This was a way for parents and children to communicate together to solve a common problem. It wasn’t focused on a student’s success or achievement in the classroom; it was simply a way to work together. Some families choose to free-build during STEM night and let their creativity run wild. I had many adults ask how they could help support our little Design Studio. To that I answer by donating! They seemed pleasantly surprised that the cleaning out of a toy or craft room would help increase the engineering in our classroom.
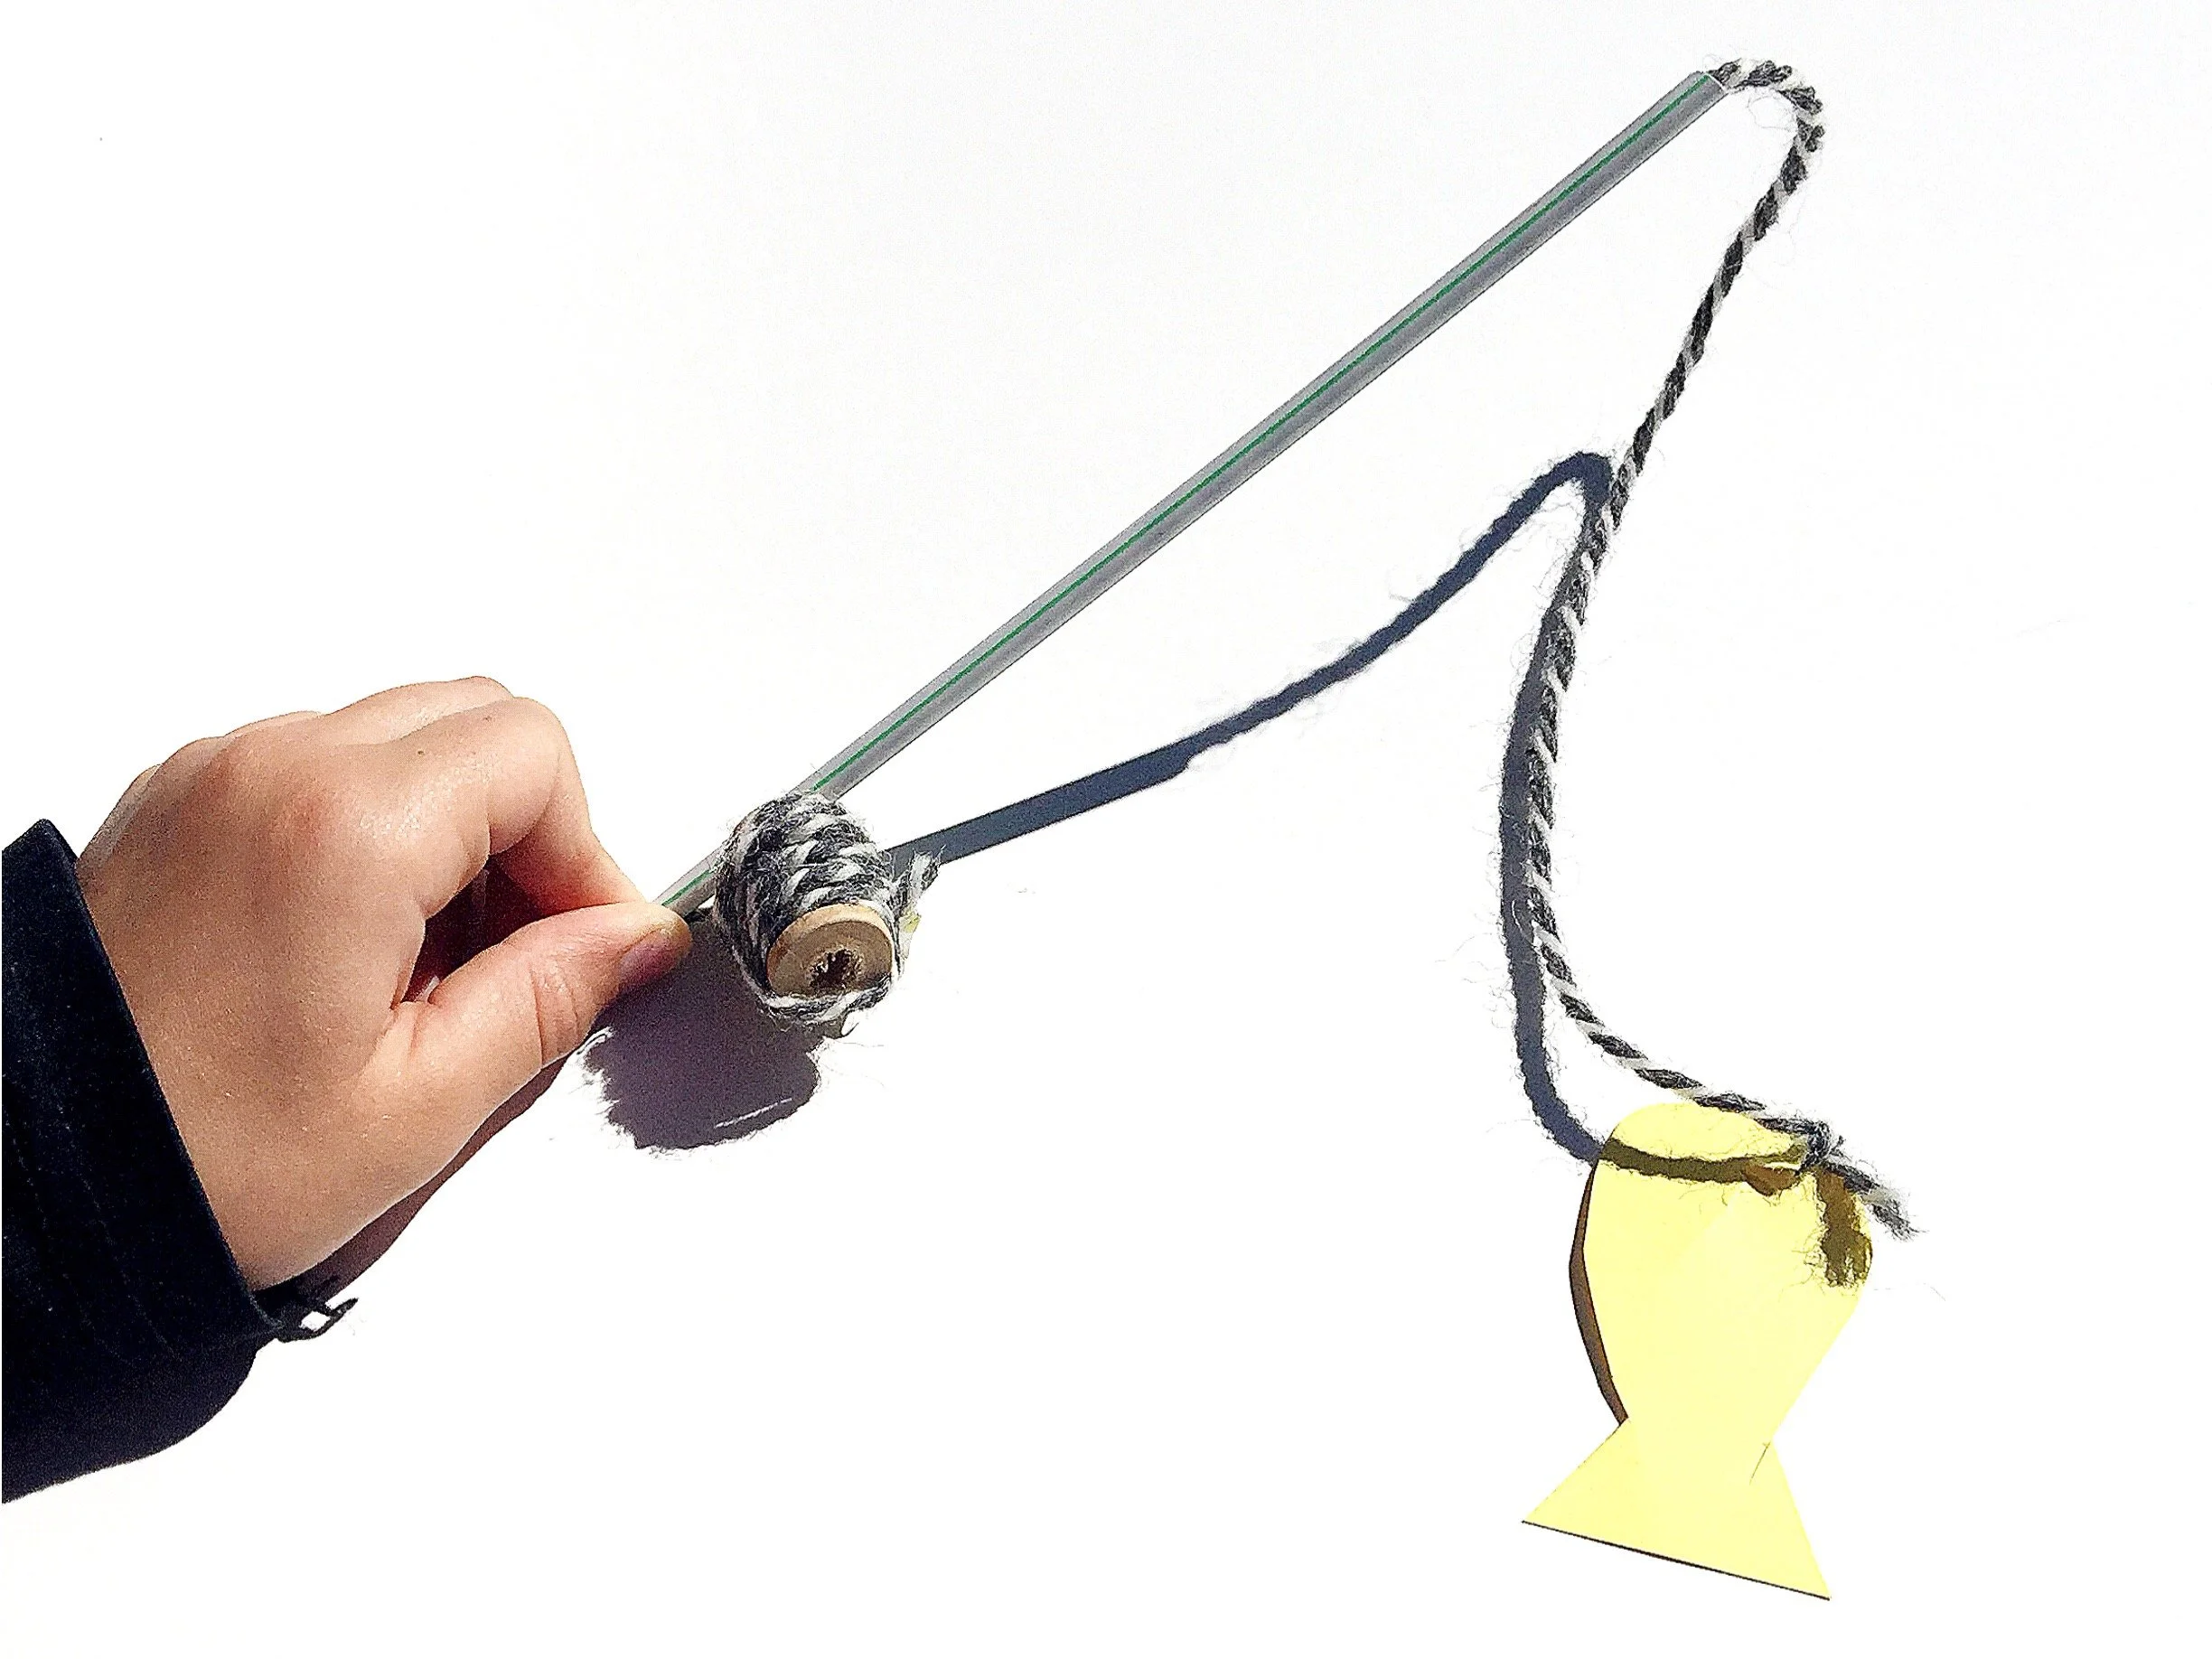
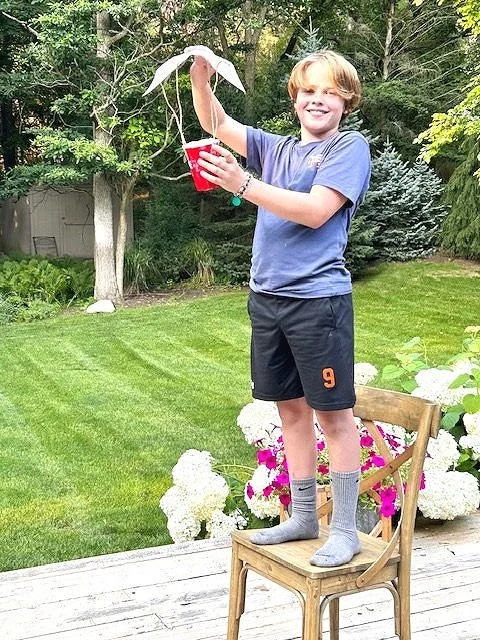
One student created a fishing pole!
I also make sure that each time my students take part in an engineering project I document all of the stages. The moment the challenge is introduced I post it to our classroom Seesaw account (our online portfolio) with pictures or I have the students create a post to share. I then quickly snap pictures throughout the process to document the engineering the students are taking part in. I do all of this as the students are working so it is never something extra. I capture a few pictures, add a 1 - 2 sentence caption and upload. When students have completed their projects they always share their model and thinking to Seesaw. I have received feedback from many families that they really feel connected to our learning because of this practice.
We have also shared our final projects through a virtual Google Meet. Each child prepared a 1-2 minute presentation to highlight the solution they built and the importance of their thinking. At the end of the presentations parents/families are allowed to ask our class any questions they have. I find the real world audience really encourages students to take the process seriously and practice verbal communication.
Another way I encourage family involvement in engineering is through guest speakers. In the past, I have had parents who work in robotics which ties in directly with our design process. I have also had a parent who works in a grocery store guest speak. She talked about not giving up on days it is hard and the simple machines they use daily, such as the conveyor belt and ramp to load groceries. No matter what a parent does professionally or as a hobby it can be tied into engineering. In my experience, both the student and family member loved coming in to share their expertise.
The Design Studio is an excellent way to incorporate engineering into all areas of your teaching. However, it is not a traditional way to teach. In order to gain support you need to be intentional about how you bring your colleagues and families into this new way of learning. As soon as they experience the power of open-ended problem solving they will be hooked!
So go ahead and get started by grabbing your free set of engineering posters here!

How to Setup a Classroom Design Studio
Design Studios, aka makerspaces are a key part of hands-on learning. This space will increase student engagement and improve student motivation. They are easy to create, Earth friendly-hello recyclables, and will improve your students’ problem solving skills! Integrate this area into any subject for any grade level and your classroom will become transformed.
It’s time to increase lesson engagement and have your students excited to learn!
Six years ago, I introduced engineering into my classroom using a Design Studio. The first day my students entered my room they were drawn to it! The awe on their faces quickly turned into questions. What is this? What is it going to be used for? Can we use it now? To say the students were excited is putting it mildly. They wanted to dig in immediately! I explained to the students that today they would “free build” to get to know the Design Studio. They all cheered in anticipation! After the initial introduction, I incorporated the makerspace into math, science, reading, social studies, etc. Students return to visit me year after year explaining the impact this simple space had on their learning.
Read on to find out the steps to setting up a successful Design Studio.
You will learn the following:
⚙️ Material collection
⚙️ Suggested materials
⚙️ Helpful tips
⚙️ Examples of how I have used the Design Studio in my classroom
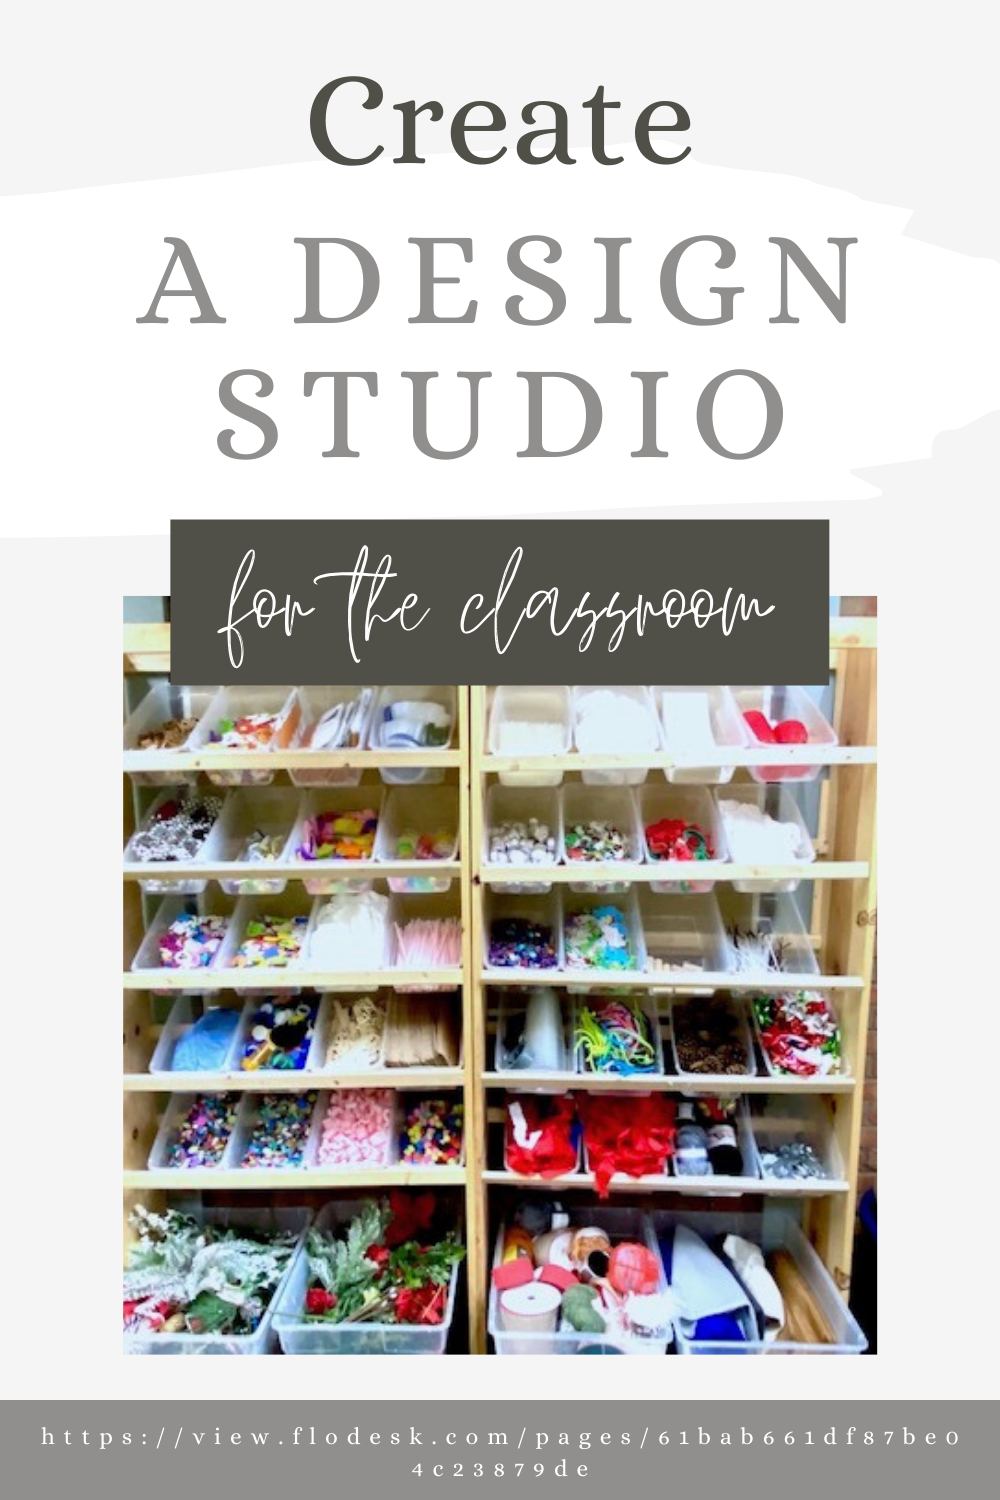
How to Start
The first thing to do is create a location to collect recyclable materials. This can be as easy as having a bin filled with a mixture of supplies, shoe boxes with items organized into separate spaces, or a grocery bag with random supplies that can be shared between a group of students. I have built a permanent location in my classroom because I rely on engineering so much in my teaching.
The materials I collect are free and easy to gather. I find that families are looking for a way to support the school, however some are not comfortable or do not have time to volunteer. These donations allow families to support our learning while decluttering their house. In my book, it’s a win-win for everyone! The following is a list of items that I suggest for donations:
⚙️ Paper towel rolls
⚙️ Coffee filters
⚙️ Popsicle sticks
⚙️ Leftover toy parts
⚙️ Nuts & screws, etc.
⚙️ Packing peanuts
⚙️ Plastic caps from bottles
⚙️ Wine corks
⚙️ String
⚙️ Fabric
I do use masking tape and glue sticks as the key component to attach items together. White glue is helpful for younger elementary students, however beware because it can get messy!
Important Ideas to Remember
When students are using the Design Studio I have a few key expectations. The first is (if the students have to go to one location for supplies) they must only grab 5 items and then they must return to their seat. After all students have gathered their first 5 materials the students can come back and forth as much as they please. This quickens the initial “shopping” time.
I also explain that if students are building in partners they must decide who will keep their model. There have been many times that this conversation did not occur before model building. When the design was complete the students began to argue about who would keep the prototype. If they both want to keep the model, they can each build side by side and create the same model.
Ways I Have Incorporated Engineering Into My Classroom
I have incorporated engineering and building in many ways. In ELA, building fits in easily with read alouds or books the students are reading. Students can build the setting, create a 3D representation of the solution (or a new solution), or create an item a character could use.
In math, I have created a few challenges that cover some of the main concepts I teach in my classroom. My students have a blast using their math knowledge to solve the provided problems. I love the STEM Math Challenges because I print the student engineering journal, introduce the challenge, and the students take it from there!
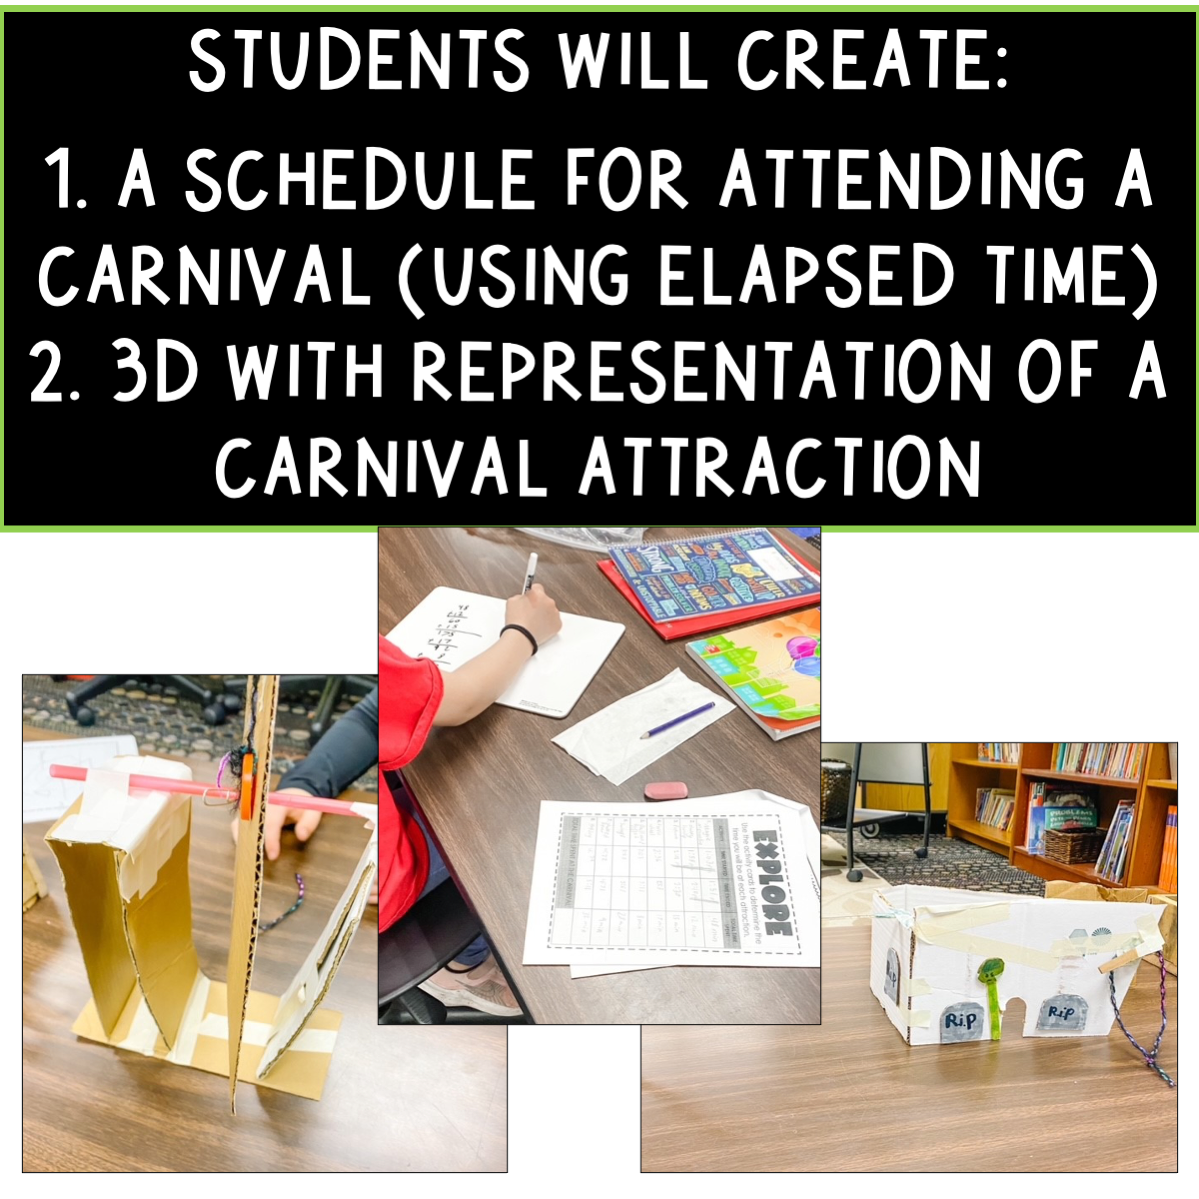
Science and social studies pair with engineering easily. For example, science students can make working simple machines or a model of the Sun, Earth, and Moon. In social studies, students can create landscapes of regions or battles, buildings, or items that represent places or an event.
Ready to Get Started?
Still not sure? Just give it a go. Start with collecting minimal supplies. Organize your material in a simple way (see above) and select the subject you will dive deeper into by engineering a model. Introduce the challenge to your students, have them brainstorm a solution, plan the solution, and build a model of their solution. Watch the engagement and creativity soar!
Grab a set of free engineering posters here!


Math Stations
You guys…I think I have finally figured out the most successful way to teach math!
You guys…I think I have finally figured out the most successful way to teach math!
Let me fill you in on some teaching strategies I have used in the past but they were never quite right. First I taught math using the traditional whole group lesson method. I started with a markerboard warm-up and I then taught a mini lesson as the students practiced in their math journals. As the students finished, they would move to a math game or an extension. I felt like I didn’t really know my students as mathematicians as much as I wanted to. Plus, the engagement level was not what I had hoped for.
Another way I have tried to teach math in the past was by splitting the class in half. One half of the students were with me as I taught the daily lesson and they practiced in their journals. The other half of the class was taking part in either a math game, an extension, or a review activity. I liked teaching the smaller group. However, I was constantly managing the other side of the room. Having that many students in a group was extremely distracting.
I have recently experienced my Goldilocks moment when it comes to math teaching! I use 4 stations daily. It’s easy to plan, I know my students as mathematicians, and the students can move at their own pace. This has increased engagement. Planning is easy because there are only four stations. Three of the stations use activities from our district’s math curriculum, Everyday Math, so they are already planned. The fourth station is games and yes I do find some from our curriculum, however, I have also created many lines of games. Creating multiple games with different concepts that have the same rules makes it so my students are familiar and have few questions about what to do. I do always offer the students an enrichment activity for early finishers.


Stations have allowed me to know my students so much better as mathematicians. This is because they practice with me daily in small groups. Right now I know I have a student who struggles with visual concepts such as measurement and fractions. I also have found out who excels at problem solving and critical thinking. This information allows me to differentiate to meet the students needs.
Using math centers as my style of teaching has increased engagement because each center lasts about 13 minutes. The students are constantly moving and working on different activities. I make sure that students are clear about extensions and games during small group to eliminate interruptions. One of the greatest outcomes from stations is that I hardly have any management issues because the students are so focused!

What are these four stations you say? Let me describe them to you. I teach a pullout program so I have a total of 60 minutes for math instruction. This leaves me with about 13 minutes for each station. I also give the students a couple of minutes to transition between stations. The stations are:
Teacher - This is at a small group table with me.
I begin with a short warm-up, usually this is the students showing their thinking on a markerboard. This is quick. The students know that they only have a small amount of time to respond and I start as soon as the first child sits down. The fast pace and start encourages the other students in the group to come to my table quickly.
I then move to the daily math lesson. We use Everyday Math in my district and I teach the daily lesson from that curriculum. I make sure to give the students time so I can see them practice the concept before they move to the next station. Yes, this does mean I teach the lesson more than once. However, I don’t mind it and I am so much more effective on my third time around!
Independent - This always comes after the teacher station. These are the pages in the student journal that go along with the lesson and give students the time to practice. Most students work on this at their table seat however some prefer flexible seating by themselves. I give the students a choice on where they think they will be the most successful. So far I have been proud of their decisions!
Math Boxes - Everyday Math is a spiraling curriculum and they have included pages in the students math journal called math boxes. This is a page with 6 concepts the students have already practiced. If you do not use Everyday Math you can just use some sort of review page. This station can fall anywhere in the rotation (since it is a review), it can even be the very first station. Beware! The students usually move through this station the fastest, I always have an enrichment opportunity available. *See below for more information on this!
Game - The students also take part in a small group or partner game. I always select a game about the concept my students have just studied or a concept they need to review. Some of these games come from the Everyday Math Curriculum but since we play math games each day I find I do not have enough choices to keep my students engaged. I have created many math games that my students love. I find that when the game directions are clear the students begin much faster and hardly ever interrupt my small group. When directions are difficult or confusing, watch out for off task behavior.
Some of the games my students play are dominoes. This is where the student starts with the first domino (it says start) and reads what is on the other side. They then must find the domino with the matching answer. They continue to place the dominoes until they get to the last domino and read the word “End.” This is a self-correcting activity because If they have any dominoes left then they know they did not solve the puzzle correctly. One thing I have learned over the years is to give the student the count of how many dominoes are in the stack. Otherwise, they are positive their deck is missing some!
Checkout a mini domino game for free here:

Need a lot of various topics? Checkout my domino bundle:
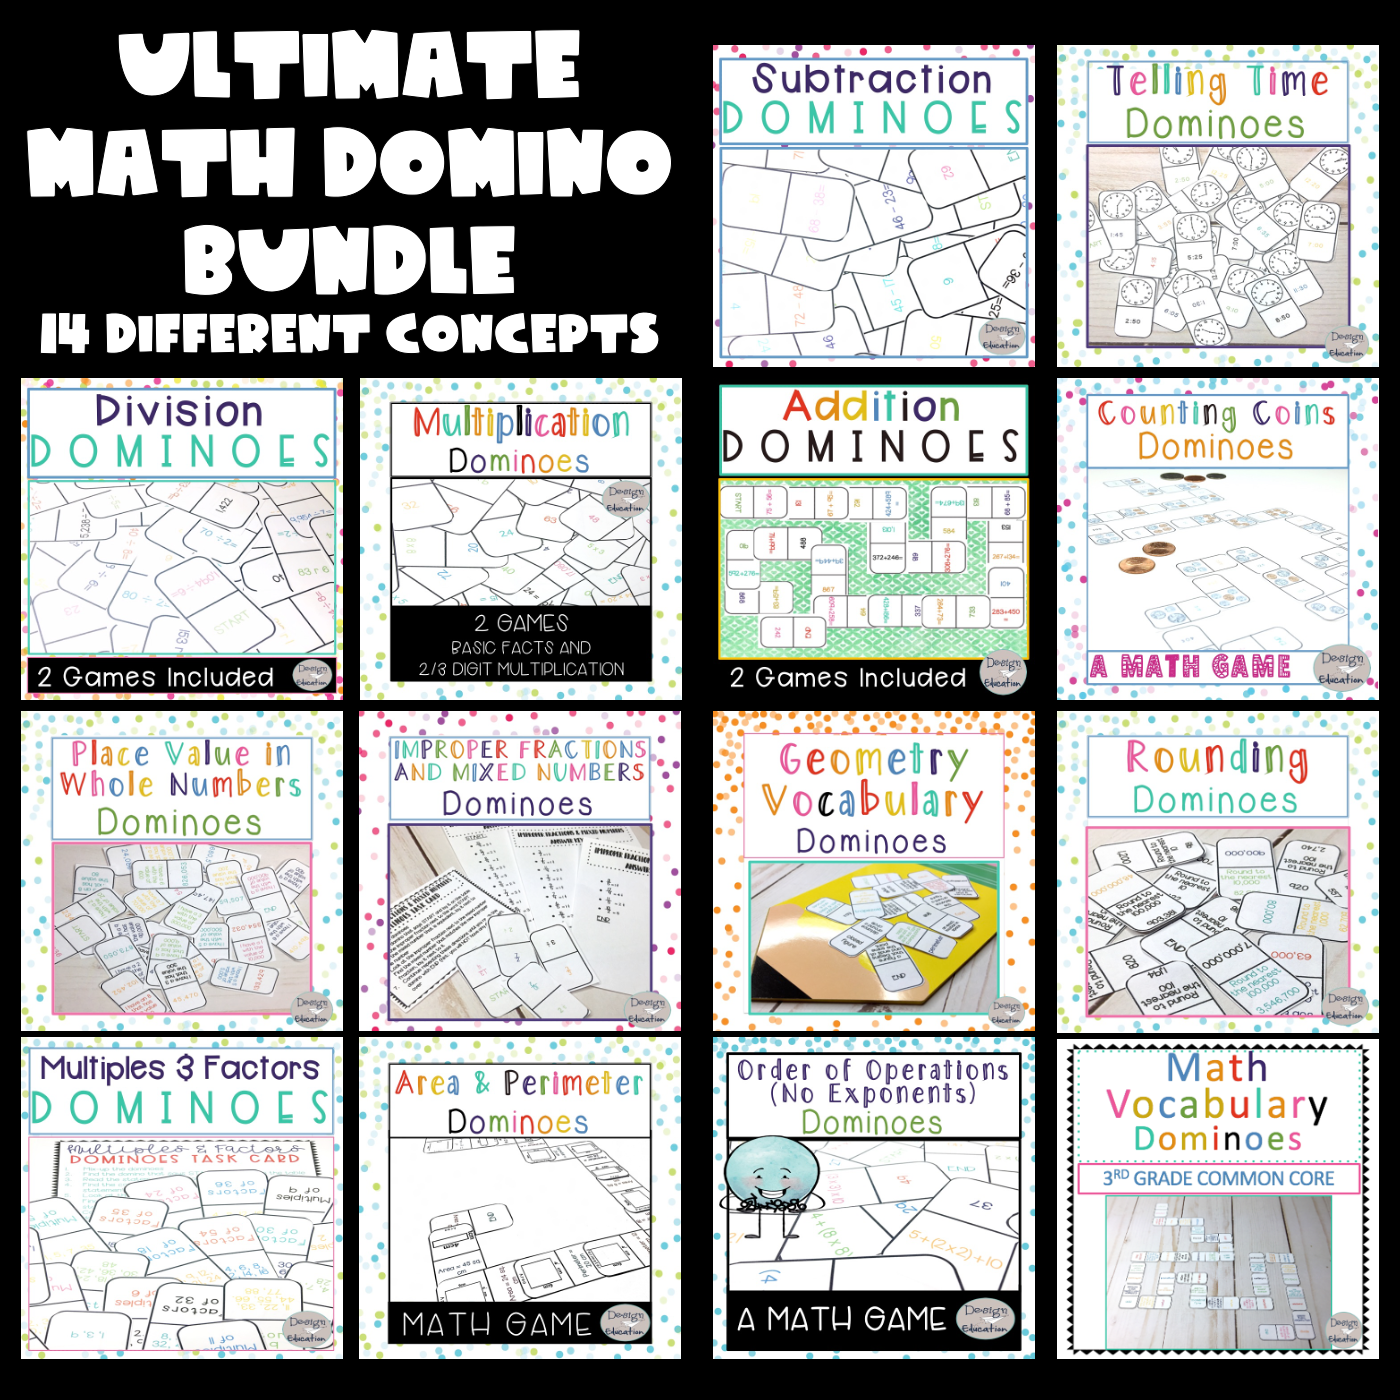
I also have many individual decks (printable and digital) in my Teachers Pay Teachers store.

The game station is flexible because the topics are review concepts and the center can fall anywhere in the rotation. If needed I teach new games during the teacher station before I have the students play independently. This is another reason I love dominoes. Once the students understand the game you can place new versions in the center without any instruction!
At this time I only have 3 different groups of students with 4 rotations. That leaves the last rotation for me to check journals, reteach concepts, answer questions, confer, etc.
Students will finish each station at various times. I always have at least a few extensions for the students to choose from. I also try to align these extensions to the concept being taught or a concept that needs more teaching. For example, right now it’s January and the students are studying area and perimeter. I created Draw a Scene printables that the students love! The students look at the figure and then determine it’s area or perimeter based on the question. They then have 2 answer choices. The students determine the correct response and draw what the answer says to draw. When the students finish they will have created a winter scene. The students stay engaged because they are practicing math and tapping into their creativity. They are also differentiated so the students can choose the level they are comfortable with or move from the easiest to the hardest worksheet. I love this activity because I just glance at their picture to determine if they included the 6 items they were directed to draw.

Got Pencils?
It all begins with an idea.
Pencil Management in the Classroom
Does every pencil in your classroom seem to disappear? No, it’s just me? It drives me crazy but I believe I have found the magic answer! This is the perfect borrowing system. All you need are clip magnets, pencils, and a magnetic space (I use my markerboard).
I clip about six pencils to the board each day. When a student needs a pencil they take one and write their name under the clip. Then when they later return the pencil they erase their name. At the end of the day I can easily see who still needs to return their pencil.

The strangest thing about this system....I have gained pencils! Students find pencils and turn them in. At the end of the week I have three times as many pencils as I did on Monday! I have been using this system for years and I am never going back!